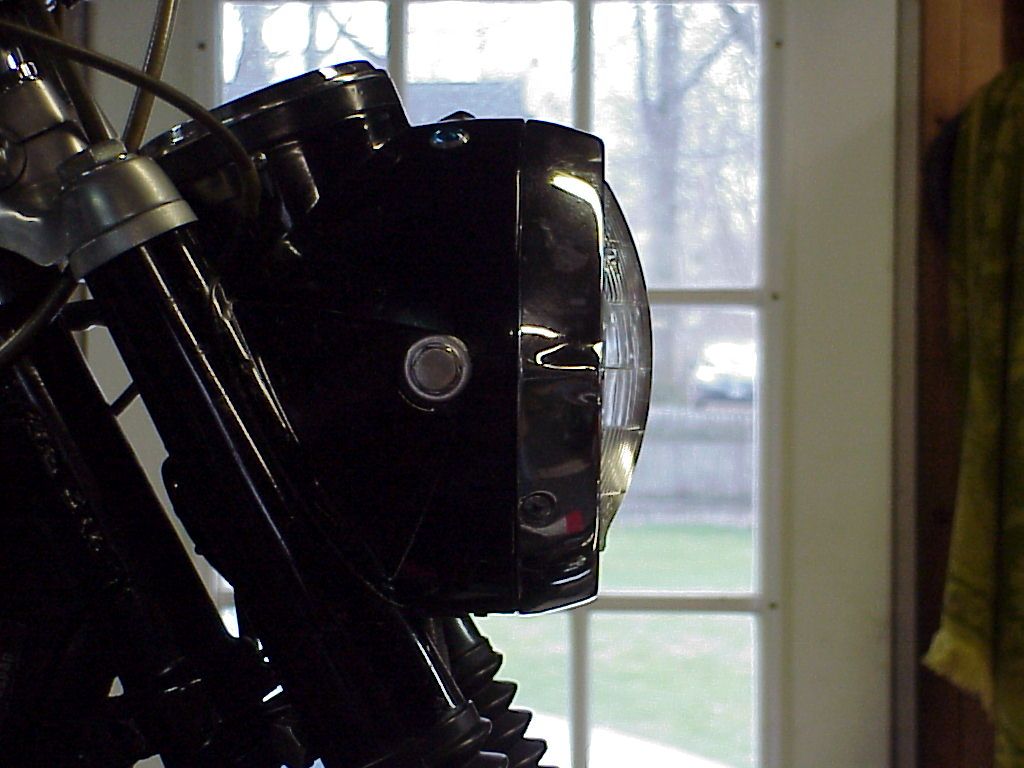
honda305 Home honda305 Auctions honda305 Gallery honda305 Forum


honda305.com Forum

Login
□ Search
□ FAQ 
□ 
Vintage Honda Owners,
Restorers, Riders and
Admirers

Late model CL77 Headllight Modification

User avatar
Snakeoil
honda305.com Member
Posts: 1150
Joined: Wed Aug 04, 2010 6:45 pm
Location: Upstate NY

Late model CL77 Headllight Modification

Post by Snakeoil » Sun Apr 14, 2013 11:05 am

I thought about submitting this as just another post in my original headlight thread. But thought it might be better to have a separate thread to make it easier to find for those wishing to do this mod. If somebody wants to know the background that created the need to do this, just read that other thread.

I wanted to come up with a way to put a readily available headlight in my late model headlight rim. This is the rim that has two ears in the rim that mate with two ears on the reflector/sealed beam unit and attach with a screw, and has a 3rd ear thru which the adjusting screw goes for side to side beam aim.

I had an old 5-1/4" automotive sealed beam, unit in my cabinet. This is also the same light that is used in a number of Harleys. I thought it was a good candidate and came up with a way to mount it in the rim. Another challenge with these headlights is clearance to the speedo cable. There is not a lot of room in there. This provides adequate clearance as well.

For those planning on doing this, I have no special sheet metal tools. The tools used were:
Band saw
Sabre saw (can be used if you don't have a band saw)
Ball peen hammer (using the flat hammer end and NOT the ball end)
Drill press (hand drill will work)
Files and sandpaper
Polishing wheel (find paper, steel wool and Mothers polish can be used in place of this)
Pieces of 4 inch PVC pipe
Piece of wood
Home made bending break (vise, mallet and piece of wood can be used)


I first made an adapter rim that fits into the OEM rim. It is made from 1/16" aluminum sheet. I started with a cardboard template and once I had it right, I transferred the pattern to the aluminum sheet, which I then cut out on the bandsaw. ID was cut with the sabre saw.

I cut a goove of the proper radius in a piece of pine to let me start the bend in the rim. I acutally did not expect this first iteration to come out as good as it did so the inside of the bend is rougher than I would have liked due to the punch/chisel I used.

With the goove cut in the wood, I used a rounded piece of flat steel as a forming punch and tapped the metal into the groove a little at a time for the full diameter. Once the bend was started and I now had a dished piece, I used a short piece of 4 inch PVC pipe, upright in my vise as an anvil and then continued to form the dished bend on the adapter rim with a ball peen hammer and the edge of the PVC pipe.

With that done, I put the rim, concave side down, on the bench and lightly tapped the ID with the ball peen hammer to dish it as well. You will see why in the photos below.

Here is the finished rim adapter
Front, polished side. This will face out and be seen.
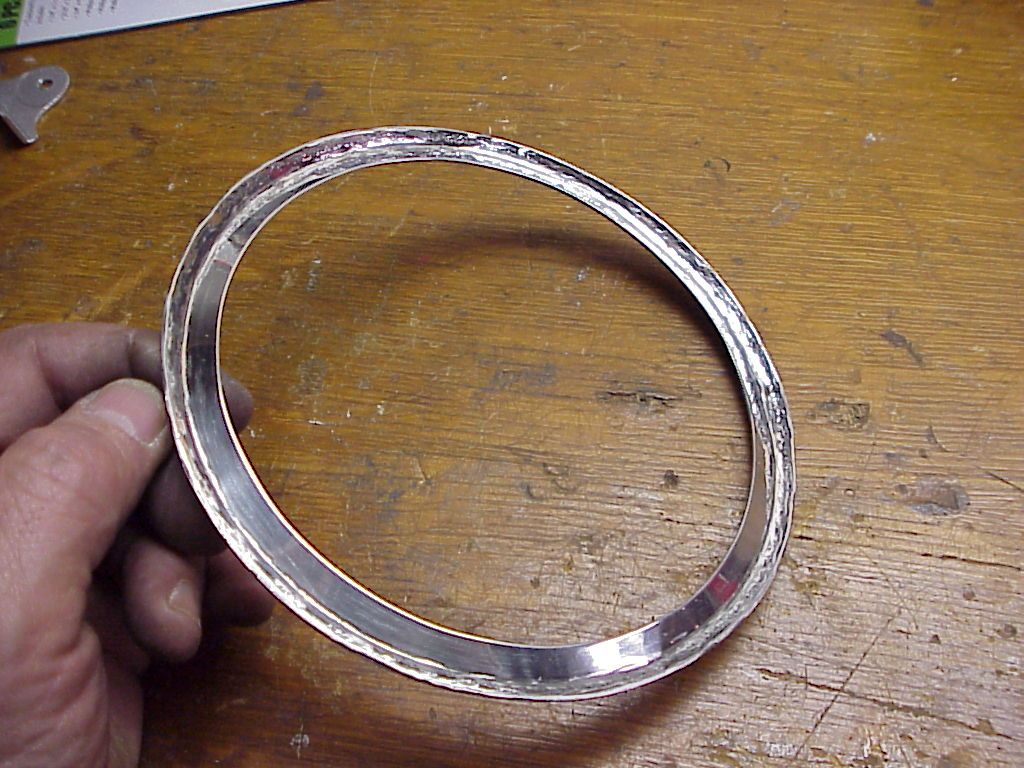
Image

Back side which faces inside the headlight shell.
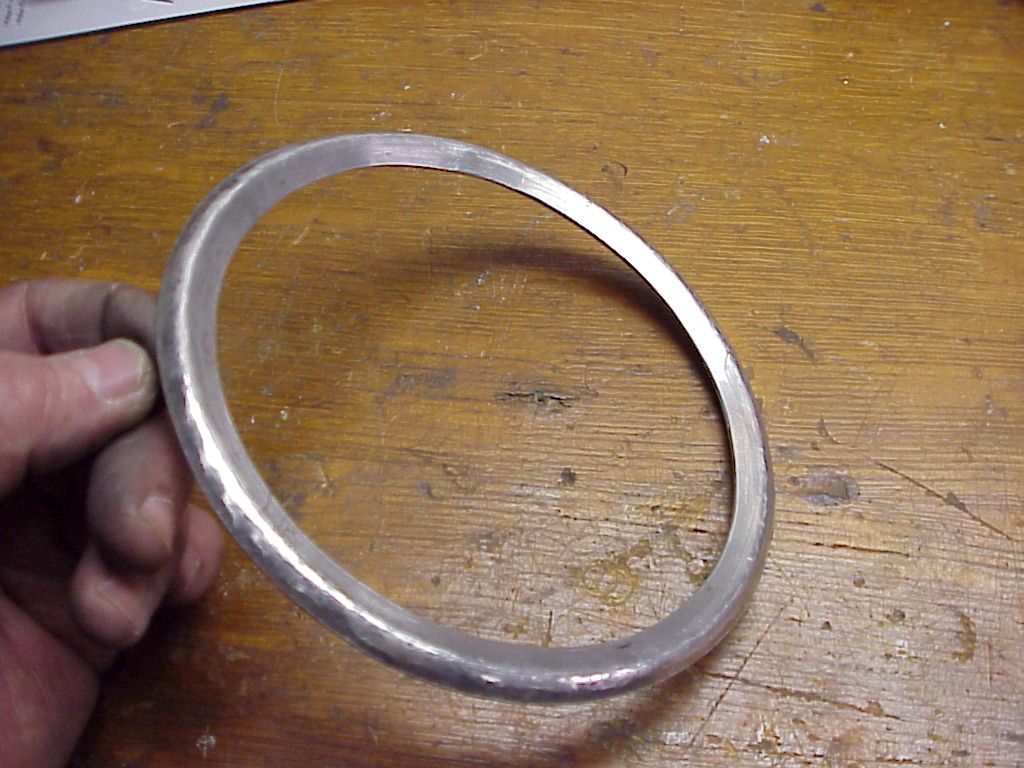
Image

Here is the adapter rim mounted in the OEM rim. Not that the concaved shape fits over the raised edge on the inside of the OEM Rim.
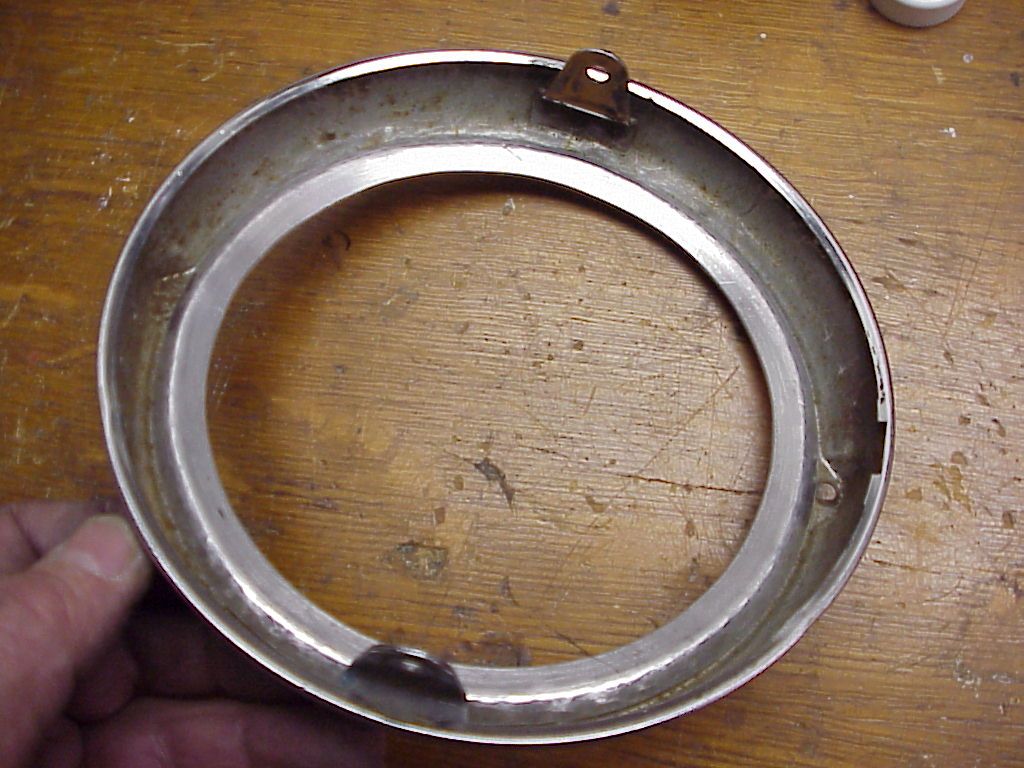
Image

Here is the headlight unit mounted in the OEM rim with the adapter.
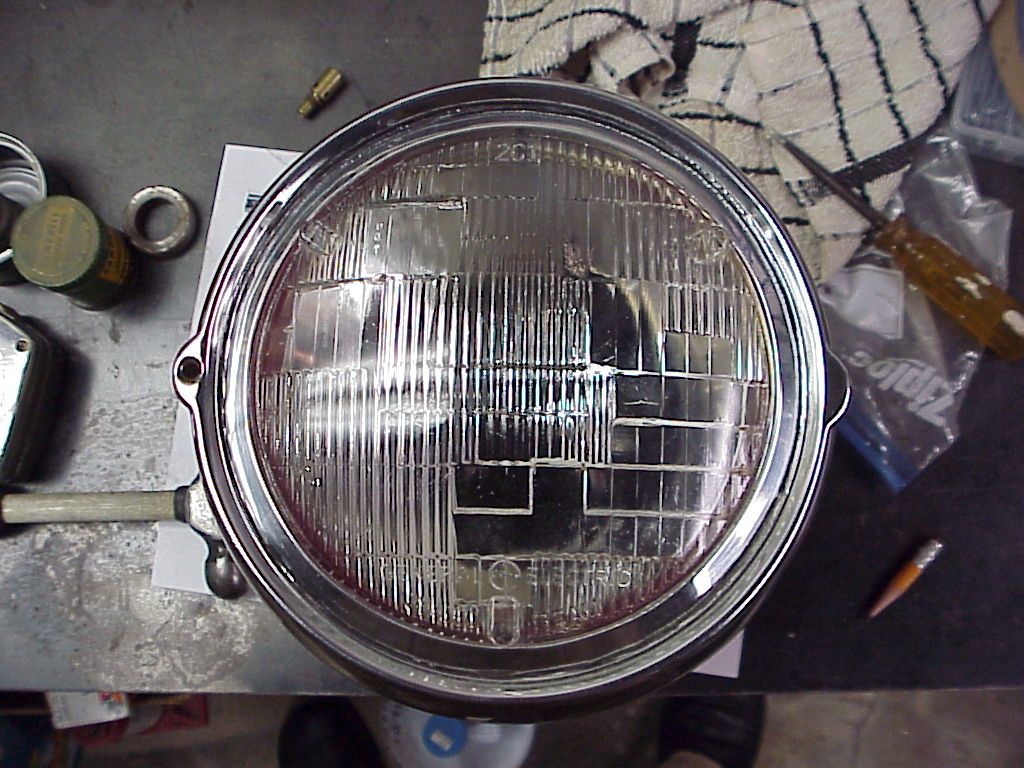
Image

Here is a view from the side showing why I dished the ID of the adapter. It makes the adapter flow into the shape of the headlight, making it look like they belong together.
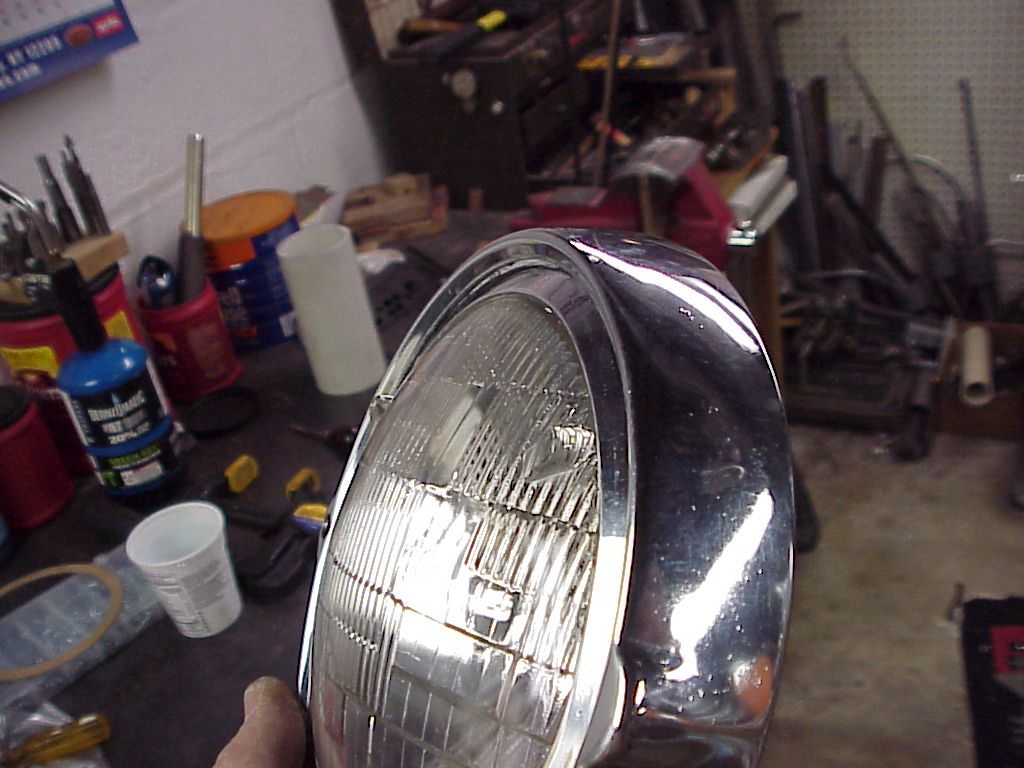
Image

With this done, stared at the assembly for a long time, even went up and had lunch while I noodled on how to fasten it inside the OEM rim. I tried making spring clips from some 0.048 music wire I had. But it just was not a good application for those clips because of the distance between the ID of the OEM rim and the OD of the headlight.

So, I decided I would make use of the two mounting ears on the OEM rim and made two brackets that fasten to those ears. The shape of the brackets is such to engage the indexing lugs on the back of the headlight to keep it properly oriented in the OEM rim.

Here are the two brackets
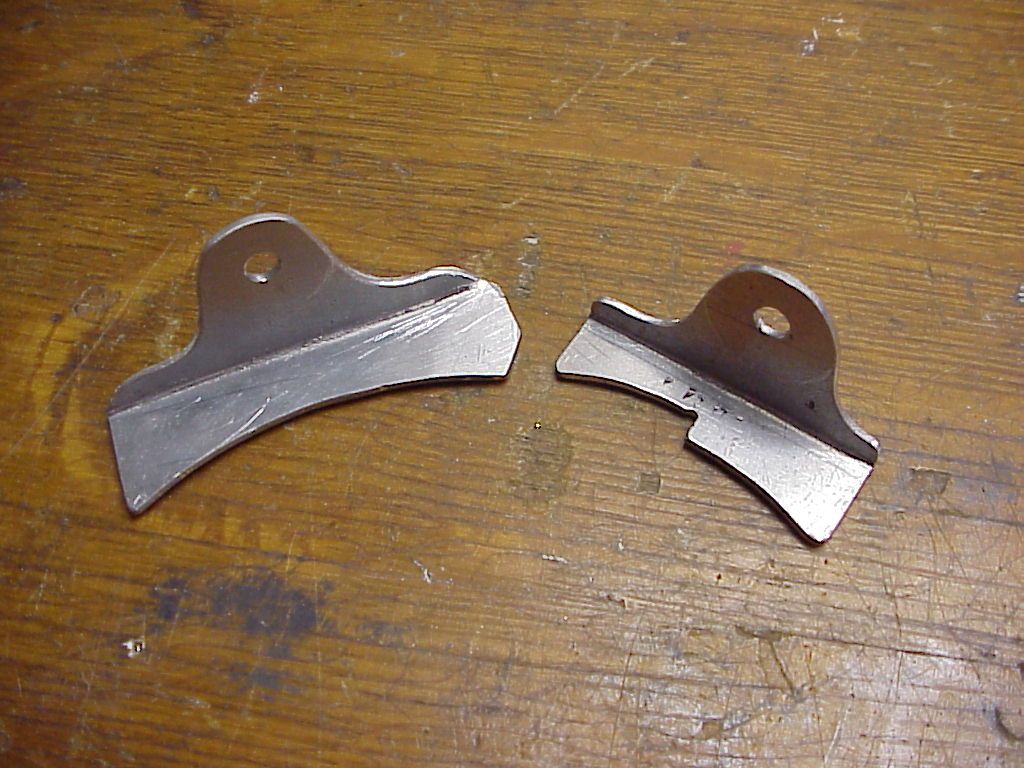
Image

Finally, here is the headlight, mounted in the OEM rim with the two brackets.
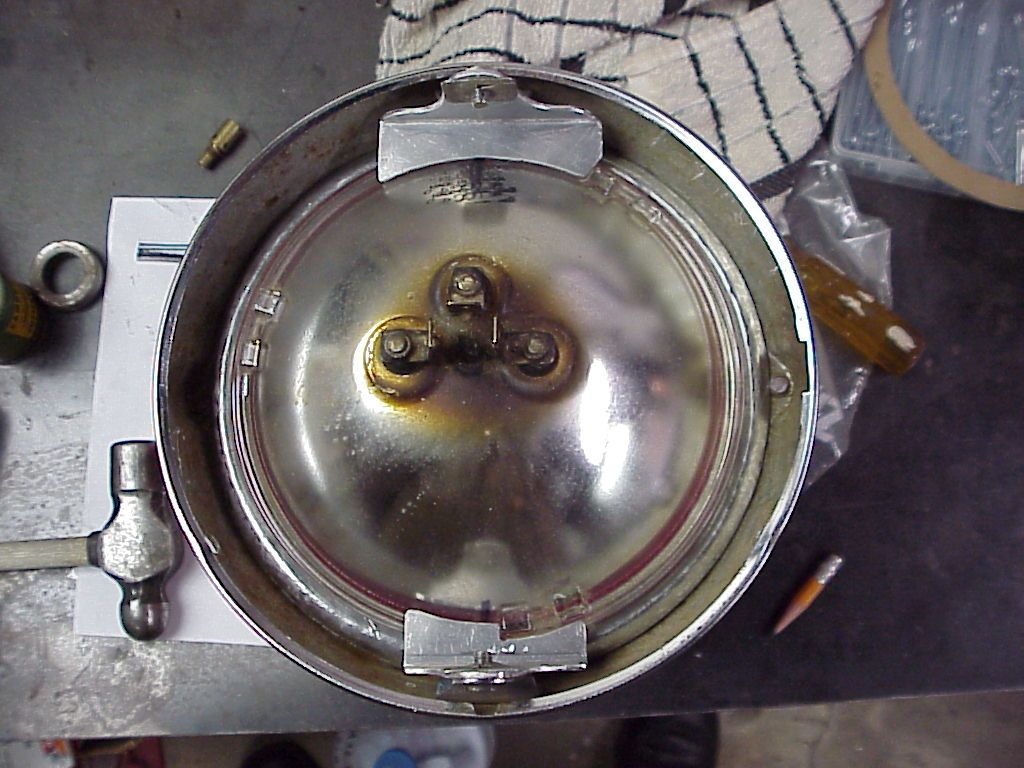
Image

Turns out, the headlight I found in my cabinet, had a burned out filament. So I need to buy a new one. Halogen headlight is $8.50 at NAPA. 35w/35W light so not any more taxing than the OEM bulb on the charging system.

When I get that light, I will bond the two mounting brackets to the headlight with 3M 5200 urethane adhesive. This will provide a flexible mount. I may also put a bead of silicone around the OD of the adapter rim on the inside of the OEM rim, which makes it more secure and is still removeable.

I put the adjustment screw, spring washer and nut back together in the original hole and tightened it down to be sure. It just plugs the hole, nothing more.

I think this "kit" has merit as an aftermarket mod kit for these bikes. rim would be a simple stamping and same for the brackets. Not sure if there is a market, though.

regards,
Rob

User avatar
G-Man
honda305.com Member
Posts: 5678
Joined: Wed Mar 25, 2009 5:17 pm
Location: Derby, UK
Contact:

Post by G-Man » Sun Apr 14, 2013 4:12 pm

Rob

Fabulously ingenious modification. Thanks for sharing that.

G
'60 C77 '60 C72 '62 C72 Dream '63 CL72
'61 CB72 '64 CB77 '65 CB160
'66 Matchless 350 '67 CL77
'67 S90 '77 CB400F

User avatar
Snakeoil
honda305.com Member
Posts: 1150
Joined: Wed Aug 04, 2010 6:45 pm
Location: Upstate NY

Post by Snakeoil » Mon Apr 15, 2013 10:06 pm

Thanks, G-man. I picked up a new sealed beam and they are made with steel reflectors now instead of being all glass. This makes the rim thinner and thr indexing lugs are now loops of sheet metal. So, I had to make two new brackets and this time I made the bottom bracket engage the loops and not just butt up against them.

Brackets are bonded to the headlight now with 5200. Waiting for new connectors to arrive so I can finish the terminations. Will post pics of the finished light when done.

Regards,
Rob

DONZIE
honda305.com Member
Posts: 124
Joined: Wed Nov 02, 2005 9:30 pm
Location: BATON ROUGE LOUISIANA

Post by DONZIE » Tue Apr 16, 2013 5:58 pm

Ok....I know this is going through the minds of many on this forum but so far everyone is tight lipped....I'll step up & ask

If you guys are having that many problems getting a simple headlight to work....should you really be maintaining & riding a motorcycle.......That thing can kill you!!!!

With this much chatter about a headlight.... what the heck would happen if you blew 2nd & 3rd gear in your tranny...or you through a rod.....

Ok....go ahead
Donzie

User avatar
Snakeoil
honda305.com Member
Posts: 1150
Joined: Wed Aug 04, 2010 6:45 pm
Location: Upstate NY

Post by Snakeoil » Tue Apr 16, 2013 6:46 pm

In spite of Donzie's apparent inability to grasp the value of this mod, I'll finish up with the final installation.

The standard 3 prong plug I scrounged from a wrecked Saab was too long to fit in the shell. So, I thought I'd simply solder the wires to the headlight as the factory did, which was also a hint that a plug would not have worked. But the terminals on the light are zinc plated steel and don't lend themselves to soldering unless you remove the zinc.

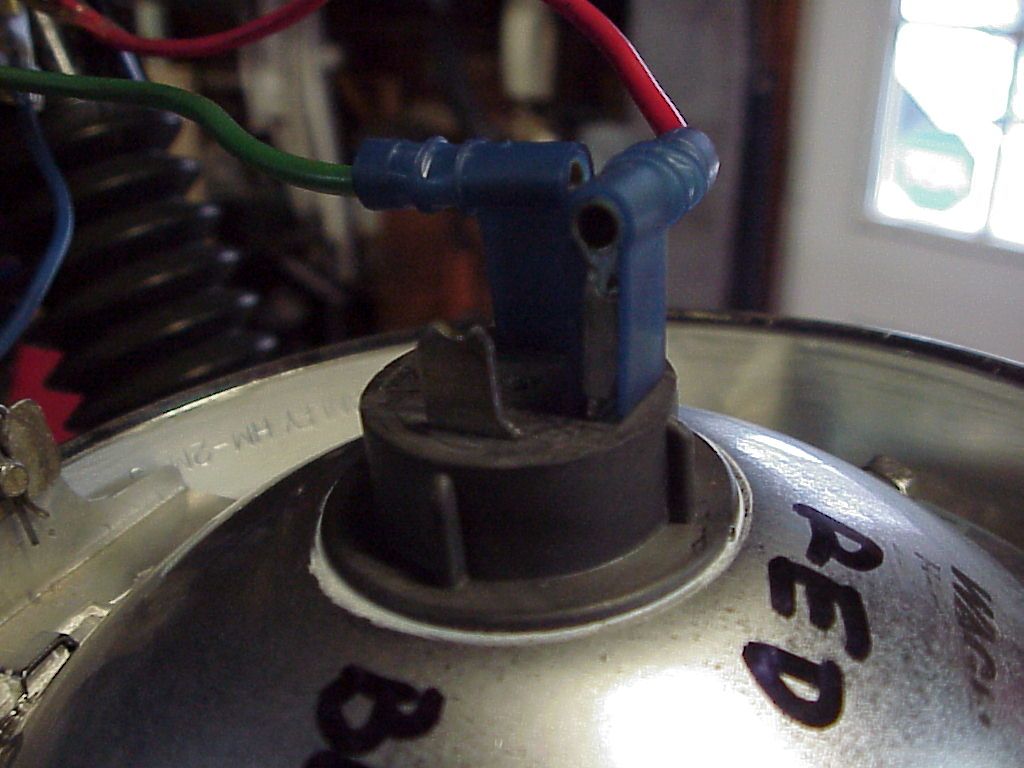
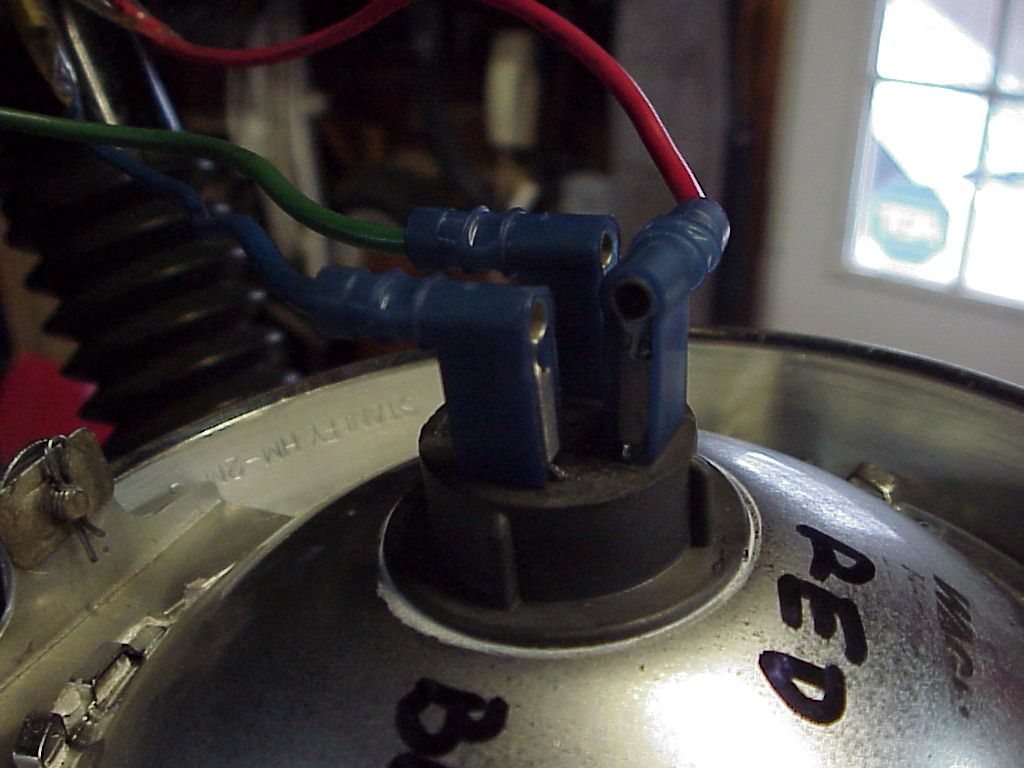
So, I went with right angle, closed barrel, crimp-on female spade industrial connectors because I had them in my spares. Had to trim the spade terminals on the light since I only had 1/4 inch connectors.

Here is the back of the light with two connectors in place and one off to show the spade terminal that has been trimmed down a bit to give a little more clearance to the speedo cable.
Image

All three terminals in place
Image

I wrapped the terminals in electrical tape just to feel better about no shorts. Heat from the light will probably have it all laying in the bottom of the shell by the end of the giro.

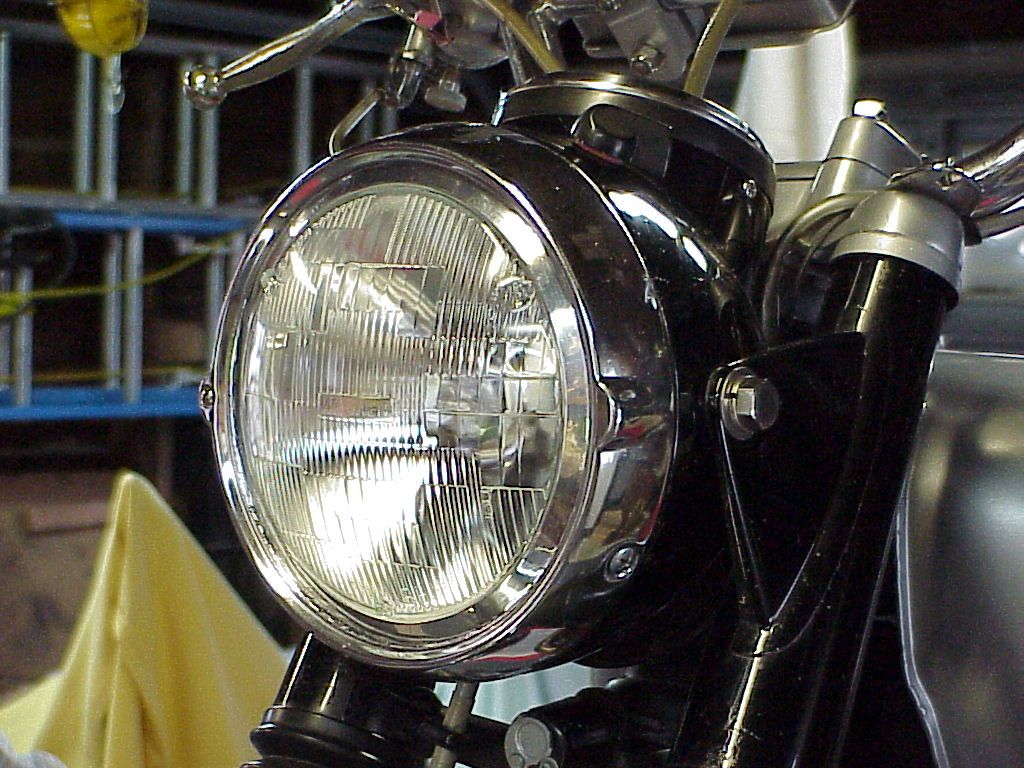
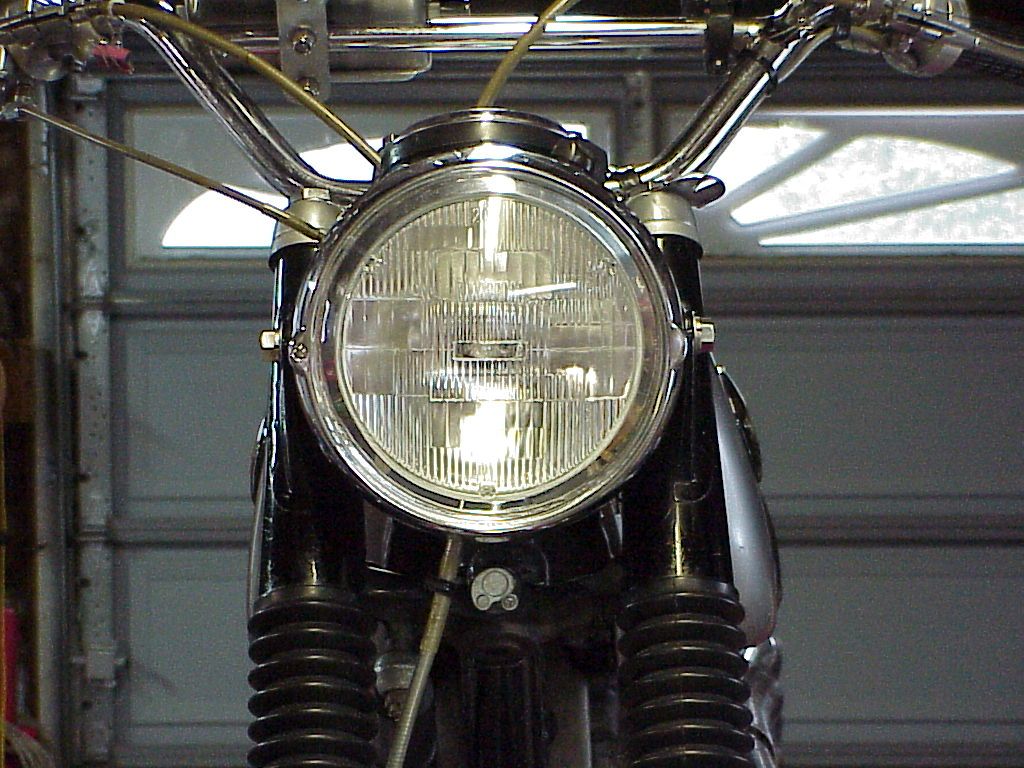
View of the light in place on the bike.
Imagehttp://i176.photobucket.com/albums/w163 ... 86a348.jpg[/IMG][/URL]
Image
Image

regards,
Rob

rrietman
honda305.com Member
Posts: 561
Joined: Mon Oct 13, 2008 6:45 pm
Location: bellingham wa.

Post by rrietman » Tue Apr 16, 2013 11:15 pm

I'm kind of with D on this.is it really that hard to just get the proper headlight? it might cost you an extra $20 over all this reverse engineering (which I really appreciate btw). but , come on, just get the right bulb.
Good luck
Randy

User avatar
G-Man
honda305.com Member
Posts: 5678
Joined: Wed Mar 25, 2009 5:17 pm
Location: Derby, UK
Contact:

Post by G-Man » Tue Apr 16, 2013 11:34 pm

I think that there is great therapeutic and practical value to be had from creating solutions which are better than "original' fitment.

If our hobby was just about spending money then we would all be riding 2013 bikes.

Keep up the good work!

G
'60 C77 '60 C72 '62 C72 Dream '63 CL72
'61 CB72 '64 CB77 '65 CB160
'66 Matchless 350 '67 CL77
'67 S90 '77 CB400F

Post Reply
cron


CB-77 | CYP-77 | Road Test | Riding Log | Literature | Zen | Marketplace | VJ Survey | Links | Home