Want to keep a Restoration Log? Post it here! You can include photos. Suggested format: One Restoration per Thread; then keep adding your updates to the same thread...
-
Sascha
- honda305.com Member
- Posts: 340
- Joined: Mon Sep 27, 2010 12:36 pm
- Location: Toronto, Canada
Post
by Sascha » Mon Dec 13, 2010 9:22 am
I managed to get my entire bike back together without putting a scratch in it... Just take your time and use tape to protect it while you put it all back in place. Keep a file on hand if its got multiple layers so you can fit everything back correctly.
-sascha
brewsky wrote:Looks good....but......
Now you have to worry about scratching it up when you put it back together!
-
nc_rider
- honda305.com Member
- Posts: 111
- Joined: Tue May 04, 2010 2:35 pm
- Location: Concord, NC
Post
by nc_rider » Sun Dec 19, 2010 1:33 am
Sascha, thanks for the encouragement. ... but.. unfortunately I've already scratched it. Sort of. My painter didn't mask off the bearing races in the steering stem so I had to carefully pop the paint off of them. I used an old potters "knife" that is made of soft steel and has a tip that is rounded to almost exactly the same radius as the bearing race. The paint is still pretty fresh and that surface is really slick so it popped off pretty easily.. he still should have masked it off.
One thing I did notice was a tiny groove cut in the outer (top) edge of the bearing race. The same groove showed up on the top and bottom race so I'm thinking it was something done either intentionally or unintentionally during manufacturing. It's far too fine to have been made from wear (and there's nothing that I can see from the parts that would cause it). I'd love to know if it was a defect from some manufacturing process or by design. ?
Oh, and I did strap the frame down so it couldn't hop off the table... see below.
-
Attachments
-

-
nc_rider
- honda305.com Member
- Posts: 111
- Joined: Tue May 04, 2010 2:35 pm
- Location: Concord, NC
Post
by nc_rider » Sun Dec 26, 2010 10:21 pm
I'm loose fitting parts on the front end and have run into a problem. The front forks don't quite line up correctly with the top plate on the steering stem. See photos below. I don't remember such a poor fitment during disassembly and I don't see anything obviously out of order or out of place. The forks turn easily and it looks like the alignment of everything is as it would be if the bearings were all running in the races.
A PO apparently lost some parts from the steering damper so I found replacements. I'm pretty sure I have everything in the proper order, and it wouldn't change the angle between the top plate and the forks anyway.
-
Attachments
-

-

-
nc_rider
- honda305.com Member
- Posts: 111
- Joined: Tue May 04, 2010 2:35 pm
- Location: Concord, NC
Post
by nc_rider » Mon Dec 27, 2010 3:12 pm
I'm still pondering this one.. if I take the damper and everything above the plate off and line it up with the top of the forks then it's not even close to being in alignment with the nut on top of the steering stem. Bending the plate wouldn't correct the situation...
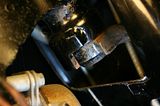
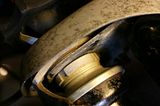
So I started looking at how the forks are attached the stem and noticed that the steering stops don't quite line up. I'm not sure they're supposed to fully line up, but it seems like they should. To do that the stem would need to go up into the head tube about 1/4" more and I'm just not seeing how that's possible. See photos below..
-
Attachments
-

- Note the misalignment of the steering stop..
-

- the washer and seal are just even with the bottom of the "cup" on the head tube.
-

- it looks like I could get the race down a tiny bit more and compress the seal..
-
clarenceada
- honda305.com Member
- Posts: 172
- Joined: Sat Mar 21, 2009 4:02 am
- Location: oregon coast
Post
by clarenceada » Tue Dec 28, 2010 1:56 am
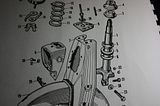
NC:It does need to go into the stem that 1/4". Here is a couple of pictures from my '63 Dream: (click on the thumbnails)


Make sure you only have the bearing race and the dust shield and washer numbers 3,5,and 6 on the steering stem.
Hope this helps
Clarence
nc_rider wrote:I'm still pondering this one.. if I take the damper and everything above the plate off and line it up with the top of the forks then it's not even close to being in alignment with the nut on top of the steering stem. Bending the plate wouldn't correct the situation...
So I started looking at how the forks are attached the stem and noticed that the steering stops don't quite line up. I'm not sure they're supposed to fully line up, but it seems like they should. To do that the stem would need to go up into the head tube about 1/4" more and I'm just not seeing how that's possible. See photos below..
-
nc_rider
- honda305.com Member
- Posts: 111
- Joined: Tue May 04, 2010 2:35 pm
- Location: Concord, NC
Post
by nc_rider » Wed Dec 29, 2010 12:05 am
Thanks for the photos Clarence! That helped me clear up some things and pushed me to look back at the bridge plate as the culprit.
Take a look at the photos below and you'll see that I dug around in my boxes and found another bridge plate from another year to compare with. What I'm seeing is somehow the bend on the original bridge plate is not quite right. My guess is a PO assembled this by bolting the plate to the steering stem and to the top of the forks then rotated the forks down until they could fit the bolts in the lower part of the steering stem.. I'm sure it fit fine like that, but it put a lot of stress on things as that bridge plate acted like a spring.
Is there any way for certain to know that I've got the right bridge plate/stem combination here? I can rebend the bridge plate to make it fit, but I would rather know for certain that I have the right parts to begin with and I'm not just forcing somebody's wrong parts together. This is a '64.. with "early" clutch cable routing, and I'm beginning to suspect that somebody put a "late" bridge plate on with "early" steering stem on it and there's some difference in how they fit. The bridge plate that was on this one has the nuts welded to the top of it. I need to find out if that's the way it's supposed to be or if that's some "fix" by a PO.
One thing is for certain.. I'm finding out that the POs put things together wrong, left parts out, bent things, etc.. so I can't rely on the "before" photos at all with this thing because it wasn't right.
-
Attachments
-

- Notice the gap between the bridge plate and the nut below.. this is with the bridge plate bolted to the top of the forks, the forks bolted into the bottom of the steering stem, and the steering stem tightened in with all bearings in place (and in their
-

- The silver bridge plate is the original one, blue one is an extra I had. This is with all holes lined up..
Last edited by
nc_rider on Wed Dec 29, 2010 7:47 am, edited 1 time in total.
-
clarenceada
- honda305.com Member
- Posts: 172
- Joined: Sat Mar 21, 2009 4:02 am
- Location: oregon coast
Post
by clarenceada » Wed Dec 29, 2010 7:45 am
NC: You are welcome; and here's another one for you. I am going to be putting my '65 Dream back together this spring and I didn't take any pictures of this area and was wondering if I would have any issues so this helps me know how things go.
The '65 is about 1/8" to 3/16" shorter from the bend of the top plate to the center of the steering stem hole then the
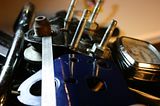
'63 is. It's hard to measure this and even harder to show it in a picture. The parallax from the camera makes it difficult to see that the metal ruler is in the center of the blue plate steering stem hole and points at the edge of the threads in the center of the stem:

Looks like you have a later plate.
Good luck.
Clarence
nc_rider wrote:Thanks for the photos Clarence! That helped me clear up some things and pushed me to look back at the bridge plate as the culprit.
Take a look at the photos below and you'll see that I dug around in my boxes and found another bridge plate from another year to compare with. What I'm seeing is somehow the bend on the original bridge plate is not quite right. My guess is a PO assembled this by bolting the plate to the steering stem and to the top of the forks then rotated the forks down until they could fit the bolts in the lower part of the steering stem.. I'm sure it fit fine like that, but it put a lot of stress on things as that bridge plate acted like a spring.
Is there any way for certain to know that I've got the right bridge plate/fork/frame combination here? I can rebend the bridge plate to make it fit, but I would rather know for certain that I have the right parts to begin with and I'm not just forcing somebody's wrong parts together. This is a '64.. with "early" clutch cable routing, and I'm beginning to suspect that somebody put a "late" bridge plate and forks on it and there's some difference in how they fit.
One thing is for certain.. I'm finding out that the POs put things together wrong, left parts out, bent things, etc.. so I can't rely on the "before" photos at all with this thing because it wasn't right.


