New Cb77 project
-
GregMcN
- honda305.com Member
- Posts: 236
- Joined: Tue Jul 04, 2017 3:34 pm
- Location: Richmond, North Yorkshire, UK
I now had everything I needed to try starting the bike. I had to borrow some cables that would not be suitable for the finished bike but OK just for a trial. I set the static timing and points gap, connected a remote fuel supply and tried. It started first time! but sounded like a bag of hammers!
I checked the tappets and they were miles out. I was sure I had set them whilst the engine was on the bench but either I had forgotten or done it wrong, so a useful reminder to double check everything.
Tappets adjusted it sounded a lot better but did not want to rev. When I checked the advance was not working so a bit of a sinking feeling thinking I would have to remove the engine and strip the head. A discussion with DJM suggested that I take the points casting off and see whether you could manually rotate the points cam versus the advance springs and you could so the problem must be external. Further examination found the problem, I had pushed the points oil seal in too far so it was dragging against the disc at the back of the points cam. Moving the oil seal further out solved the problem.
There are a couple of oil leaks that need to be addressed but at least I now know the engine will run.
Not sure I covered what Has been done to the engine but although not seized when I bought it there was a lot of rust in one cylinder so it has had a rebore. The valves seats have been recut as I struggled to get a good seal just by grinding the valves. The head and gearbox have both been stripped, obviously all seals repalced. The gearbox looked generally OK to me but with some wear on the selectors and the kick start spindle bush which was replaced.
-
GregMcN
- honda305.com Member
- Posts: 236
- Joined: Tue Jul 04, 2017 3:34 pm
- Location: Richmond, North Yorkshire, UK
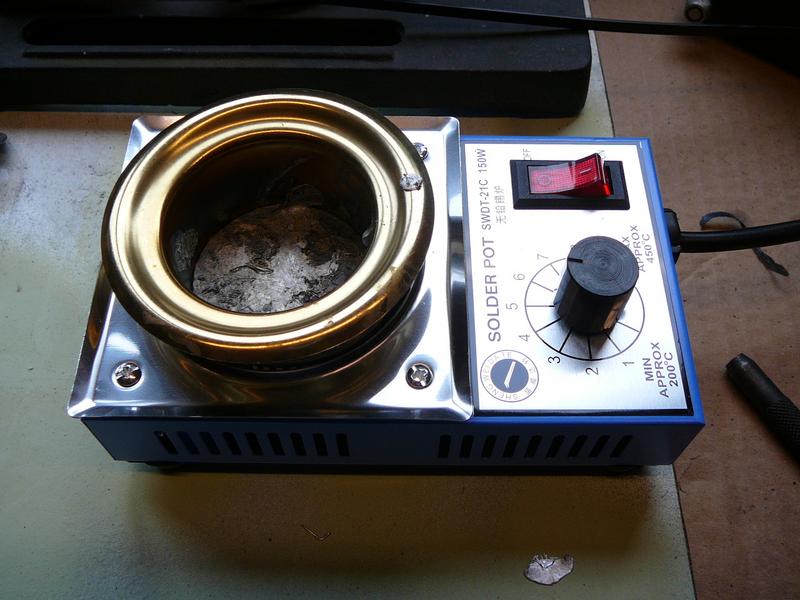
Next job was to sort the cables as all were in poor condition. As this is a later US spec bike with slightly raised bars some of the cables are not readily available in the UK. I did purchase a US spec front brake cable and a tacho cable from David Silvers but for the rest bought parts from venhill to male new cables or repair modify existing ones. After watching some U tube videos I also bought a solder pot which was only £10 and made both removal and soldering the nipples a lot easier.
Solder pot
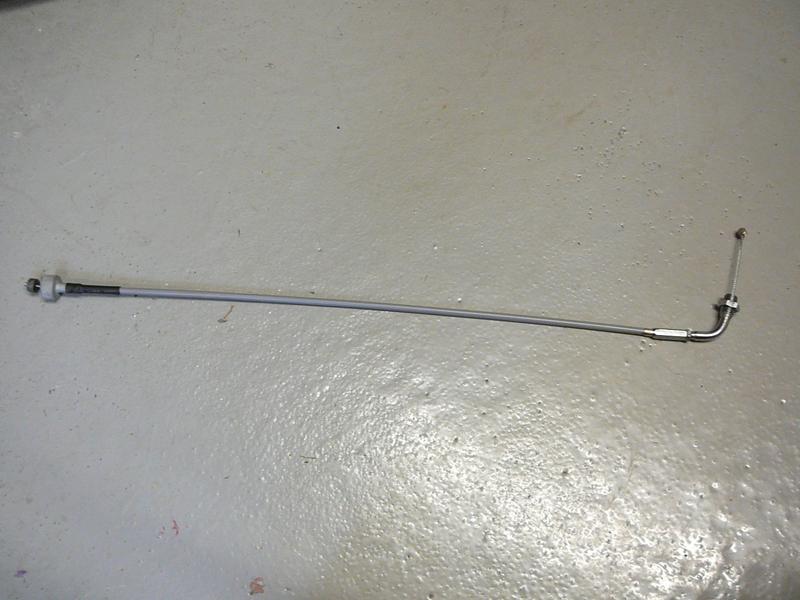
For the throttle cable I made a new top part using the existing fittings
A totally new clutch cable was made, the outer for the speedo cable was replaced using the existing fittings and inner. For the rear brake the later model has the same outer length but the inner is longer to fit the longer operating arm. Here the existing inner was OK so I was able to reuse with another outer by removing the rear nipple, swapping the inner over and replacing the nipple.
Solder pot

For the throttle cable I made a new top part using the existing fittings

A totally new clutch cable was made, the outer for the speedo cable was replaced using the existing fittings and inner. For the rear brake the later model has the same outer length but the inner is longer to fit the longer operating arm. Here the existing inner was OK so I was able to reuse with another outer by removing the rear nipple, swapping the inner over and replacing the nipple.
-
GregMcN
- honda305.com Member
- Posts: 236
- Joined: Tue Jul 04, 2017 3:34 pm
- Location: Richmond, North Yorkshire, UK
Next job was to do something about air cleaners. The ones that came with the bike were not useable. Replacements are readily available but not cheap at £60 - £70 a set so I had a look to see whether there was any alternative. The actual structure of the old ones was OK so if the paper could be replaced they would be ok.
I cut out as much of the old paper as I could with a Stanley knife leaving the remains embedded in some kind of glue.
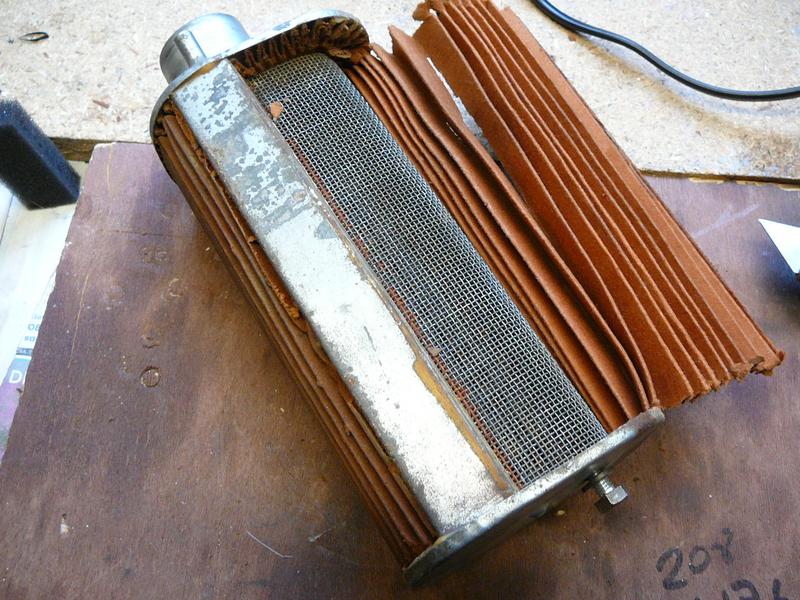
I found that the old glue could be removed by heating with a heat gun until the residual paper started to smoulder then removal by scraping with a screwdriver.
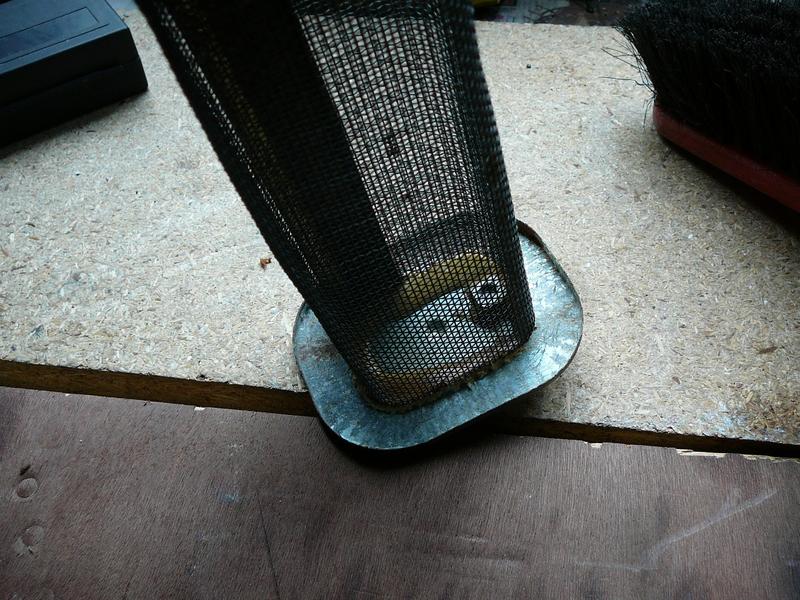
As I had no idea of the chemical make up of the glue I made sure to use a respirator. The method I used left most of the glue holding the centre cage to the end plates so it did not fall apart.
I could not find a direct replacement for the filter paper so I purchased 2 sheets of Ramair filter foam. This was then cut to size and fitted to the holder using a hot glue gun.
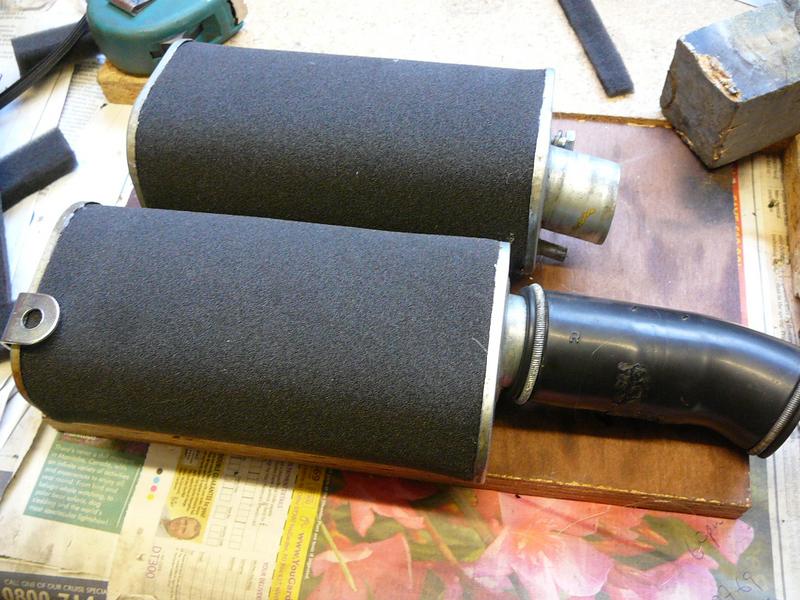
The result looked quite reasonable and only cost about £10 (providing I do not need to rejet) but in any case better to reuse the old filter body than throw it away.
I cut out as much of the old paper as I could with a Stanley knife leaving the remains embedded in some kind of glue.

I found that the old glue could be removed by heating with a heat gun until the residual paper started to smoulder then removal by scraping with a screwdriver.

As I had no idea of the chemical make up of the glue I made sure to use a respirator. The method I used left most of the glue holding the centre cage to the end plates so it did not fall apart.
I could not find a direct replacement for the filter paper so I purchased 2 sheets of Ramair filter foam. This was then cut to size and fitted to the holder using a hot glue gun.

The result looked quite reasonable and only cost about £10 (providing I do not need to rejet) but in any case better to reuse the old filter body than throw it away.
- Tim Allman
- honda305.com Member
- Posts: 504
- Joined: Tue Dec 02, 2014 9:25 am
- Location: Guelph, Ontario, Canada


