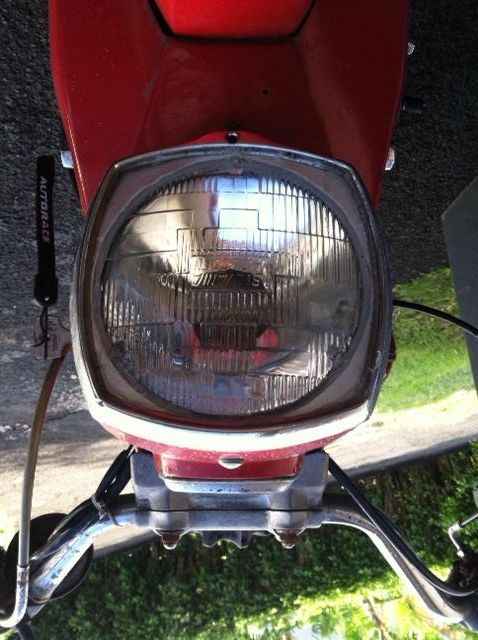
Cheap & Easy Dream Headlight ReplacementCheap & Easy Dream Headlight ReplacementMy Dream is a daily driver so I'm not too worried about 100% originality. So, when both the high and low-beams of my Dream's headlight finally burned out — after giving years of reliable service — it was time to find a replacement. Since I only paid $150 for the bike there was no way in heck I was going to pay the crazy prices being asked for a NOS (or made-in-Thailand fake NOS) unit. Not me! So I just went down to the local auto parts store, picked up an automotive sealed beam along with a universal connector to connect to the three prongs at the back of the headlight. Total cost: about $12.
I then cut a small frame from a piece of plastic that was square on the OD to fit the Dream headlight frame, but with a round ID to fit the headlight and made a few clips to hold it in place Then solder the Honda wires to the universal connector and...viola, great lights again. Nothing very original here, of course, but a very practical and affordable solution for those who don't want to get ripped off.
Don't throw your old bulb away. I was able to cut the seal around the edge of mine open and solder in a new bulb. ( the original is soldered into the reflector in the back. ) then I carefully cleaned and dried it out, wiped down the reflector and glued it back together with clear silicone and a weight placed on the lens overnight to dry. Works great and you can't tell when it's installed on the bike. I believe there was a metal band that goes around the edge and keeps it from falling apart, even if the silicone seal breaks and lets moisture in. Worth a try. I will post a picture of mine when I get back in town.
Very good info. I bet many would appreciate a how to with pics if you get the chance. ~James
| |||||||||||||||||||||||||||||||||||||||||||||||||||||||||||||||||||||


