1962 Superhawk Restoration: Here I go
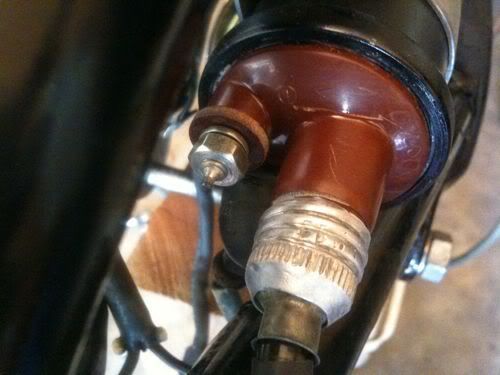
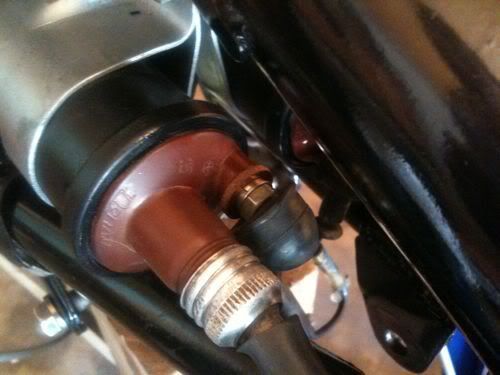
A COUPLE OF THINGS HERE.
AT THE CRIMP OF THE METAL TO THE BROWN PLASTIC TOP YOU MAY FIND A PUNCH MARK AND THAT PM IS TO ALIGN WITH THE CLAMP LOCATION WHERE IT COMES TOGETHER AT THE TOP. THE COIL WILL HAVE A (+) AND A (-) AT THE TERMINALS AND THE 12VOLT LEAD ATTACHES AT THE (+). BE SURE TO PULL THE RUBBER PART ON THE WIRE BACK ABOUT 1/2 INCH, CUT 1/4 INCH OFF THE WIRE (BOTH ENDS) AND PUSH THE WIRE TO BOTTOM AT THE COIL THEN PUSH RUBBER PART TO THE COIL AND TIGHTEN THE ALUMINUM PART. AT THE SPARK PLUG YOU MUST TURN THE CAP CLOCKWISE AS YOU PUSH ON THE CAP TO GET THE CAP TO THREAD INTO THE WIRE INSIDE THE RUBBER. ...............lm
I'm sorry, but can you explain to me what/where the "clutch rod adjuster" is? I looked in the parts manual to be sure of what part that is and there's nothing listed quite under that. The closest I could find was the "Clutch Lifter Rod", PN#22850-259-010. Is the clutch rod adjust on the left or right crankcase? I already have one washer installed behind the pin on the oil filter shaft. There seems to be alot of debate over exactly where the washer goes. What's the story on the "useless" friction discs? Thank you for taking the time to answer all my questions. I truly appreciate sharing your knowledge, and I'm doing everything I can to soak up what you advice. Current restoration: 1962 CB77
http://www.flickr.com/photos/1962_cb77_restore/ So as the reassembly progresses, a few more questions have risen that I think could be answered rather simply:
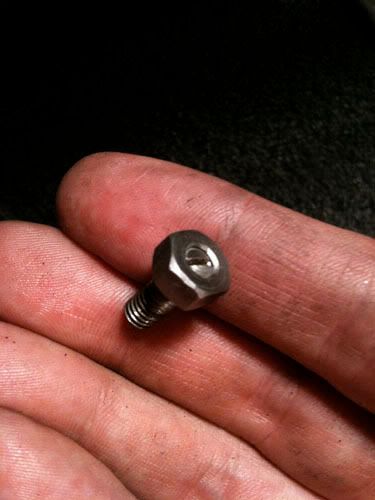
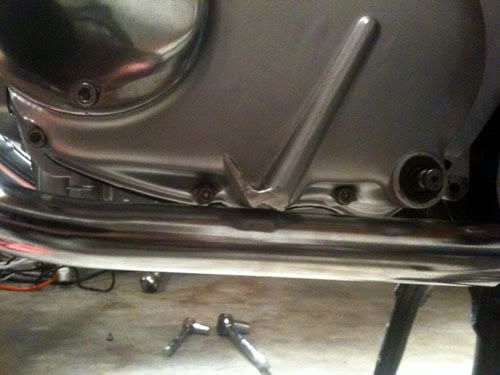
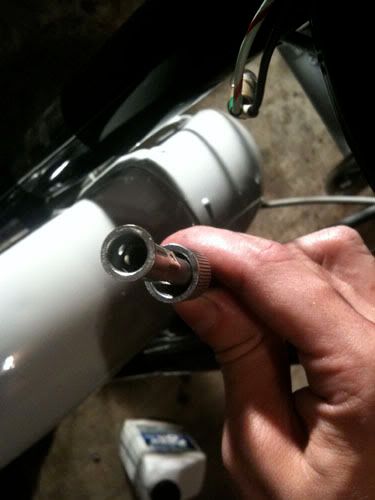
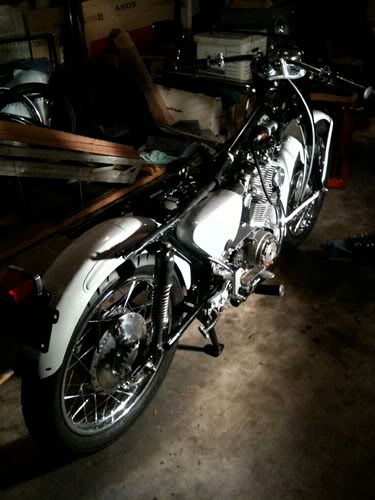
1. I read in the restoration guides from Michael Stoic that the fork oil capacity is 200-225cc. I poured that exact amount into each of the forks, and when I shined a light into the forks, I couldn't even see the "oil line". Should I just fill em to the top? I purchased plenty of oil. 2. Can you help me identify the attached bolt. It's interesting... seems like a 10mm head. But there's the flathead screw within the middle, and a core that appears to come out of the bottom on the other side. I don't remember where this came from, or what specific application it would serve. (SEE PHOTO) 3. I put the headers on tonight after letting a liner that it suppose to help prevent bluing cure. I noticed that on the left side the header is actually touching the crankcase. I switched out the headers to make sure it wasn't proprietary to just one of them. They both do the same thing. I can't remember if they did this previously or not. Is this a concern? That much potential heat right on the crankcase? I also read in Michael Stoic's book that you should never bend a head or exhaust because it can potentially create a large amount of detrimental vibrations throughout the bike since the harmonic resonance is altered. (SEE PHOTO) 4. When reassembling the instrument panel I added a thin layer of gasket sealant to the smaller rubber gasket in between the instrument and the headlight case. I also lined the inside of the instrument with RTV sealant since I just didn't feel like it was very waterproof, nor even resistant for that matter. I've gotten to wondering if there was a reason for leaving it so "open". Any potential side effects you might know of? 5. I reinstalled the tach cable. I pulled the tail end of the cable all the way though into the tachometer housing on the side of the top end of the engine, so that it was recessed deep into the hole. I'm not sure exactly how it wants to line up, but this is what made sense to me. Upon screwing in the other side to the instrument panel, I noticed there was nothing on that end. Am I doing something wrong? Does the end that goes into the instrument panel need something more to grab onto? (SEE PHOTO) Here's a shot of the bike in it's current state. (SEE PHOTO) Current restoration: 1962 CB77
http://www.flickr.com/photos/1962_cb77_restore/ Scott,
1) You won't be able to see the oil in forks, do not fill them up, use recommended amount in each leg. 2) Bolt looks like the one for the throttle housing, but it looks larger so I may be mistaken. 3) Headers, if stock, are right/left specific, and should have a L and an R stamped on them at muffler end, bottom side. 4) ? 5) The cable should be sticking out of the end about 1/2 inch. You probably have a broken inner cable. Retrobikes sells repro cables. 6) Bike is looking sweet! davomoto
2. Hmmm, interesting one, that. Needs a celestial, Ed-like eye...... The throttle friction screw is similar, but is 5mm thread with an 8mm (AF) locknut.
4. Lightly bond the instrument gasket to the instrument -- I seem to recall that the original sealant was good old Evostick contact adhesive (or similar) -- and use the prescribed screws; the 'gasket' is a vibration insulator. No harm will transpire from sealing the gasket-to-bucket joint. I wholly agree with Davo: looking good!
SOmeone please take this and run. !!!!!!!!!!!!!!!!!!!!!!!LM
| |||||||||||||||||||||||||||||||||||||||||||||||||||||||||||||||||||||


