honda305 Home honda305 Auctions honda305 Gallery honda305 Forum


honda305.com Forum

Login
□ Search
□ FAQ 
□ 
Vintage Honda Owners,
Restorers, Riders and
Admirers

1962 Superhawk Restoration: Here I go

Post Reply
Spargett
honda305.com Member
Posts: 592
Joined: Wed Jun 18, 2008 10:19 pm
Location: Los Angeles, CA

Post by Spargett » Wed Feb 04, 2009 4:52 pm

I'm sold on the aircraft stripper. My hubs need to be stripped as well, its good to hear I can use it on them too.

Though incorrect for the model rear kick starter clears everything just fine. But yeah, I'm all for the "luxury" electric start.
cknight wrote:Just didn't want you to try to use the rearward kick starter. That sudden stop when it hits the footpeg can be a real attention getter!

Spargett
honda305.com Member
Posts: 592
Joined: Wed Jun 18, 2008 10:19 pm
Location: Los Angeles, CA

Post by Spargett » Wed Feb 04, 2009 6:14 pm

A couple questions I was still wondering if anyone knows the answers:

1. Is it ok to sandblast carbs with aluminum oxide?

2. Does anyone know exactly how the commutator cover goes? Bottom lip on top or under? Is there a washer that you normally have in there? I can't seem to get the screw to stay in.


Image

LOUD MOUSE
honda305.com Member
Posts: 7817
Joined: Mon Aug 15, 2005 8:23 am
Location: KERRVILLE, TEXAS

Post by LOUD MOUSE » Wed Feb 04, 2009 6:44 pm

No on the carbs abnd ya have the cover on up side down and there is a paper sort of seal inside the part and that will show ya where to locate the cover. ...............lm

Spargett wrote:A couple questions I was still wondering if anyone knows the answers:

1. Is it ok to sandblast carbs with aluminum oxide?

2. Does anyone know exactly how the commutator cover goes? Bottom lip on top or under? Is there a washer that you normally have in there? I can't seem to get the screw to stay in.


Image
RIDE IT DON'T HIDE IT!

Spargett
honda305.com Member
Posts: 592
Joined: Wed Jun 18, 2008 10:19 pm
Location: Los Angeles, CA

Post by Spargett » Wed Feb 04, 2009 8:59 pm

Thanks Loud Mouse. Yeah, I see what you mean with the paper cover aligning to the open area where the commutator is exposed, and the rubber lining that area to help keep a water tight seal.

I think I'll just order the small washer that is suppose to be there. I don't remember ever seeing one, but Western Hills Honda says they have the 4mm washer in stock for $0.48 (which I'm hoping is true, they didn't have 1/4 of the parts for last order I placed). I'm wondering if this is the key component to holding the cover in place. Otherwise the screw just isn't enough to hold it down. The hole in the lower side isn't threaded, the screw just kinda pokes through and doesn't hold anything down on that end. I prob should have just left it all on.

I guess in a worst case scenario I can try and find a nut small enough to fit underneath it all.
LOUD MOUSE wrote:No on the carbs abnd ya have the cover on up side down and there is a paper sort of seal inside the part and that will show ya where to locate the cover. ...............lm

Gunner_CAF
honda305.com Member
Posts: 316
Joined: Sun Oct 12, 2008 5:28 pm
Location: Wisconsin, USA

Post by Gunner_CAF » Thu Feb 05, 2009 11:00 pm

Spargett wrote:Thanks Loud Mouse. Yeah, I see what you mean with the paper cover aligning to the open area where the commutator is exposed, and the rubber lining that area to help keep a water tight seal.

I think I'll just order the small washer that is suppose to be there. I don't remember ever seeing one, but Western Hills Honda says they have the 4mm washer in stock for $0.48 (which I'm hoping is true, they didn't have 1/4 of the parts for last order I placed). I'm wondering if this is the key component to holding the cover in place. Otherwise the screw just isn't enough to hold it down. The hole in the lower side isn't threaded, the screw just kinda pokes through and doesn't hold anything down on that end. I prob should have just left it all on.

I guess in a worst case scenario I can try and find a nut small enough to fit underneath it all.
I don't know if this will help, but I attached a picture. My starter is on the motor now so its hard to get a good shot. The insert is a close up of my old starter. It is not working and my son just put the parts together, but it gives you a better look.

I am not sure why the head is slipping through. Just use a common washer. I don't know if I would pay a half dollar for a little washer unless it was a big box of them :)

Gunner
Attachments
StarterS.jpg

Spargett
honda305.com Member
Posts: 592
Joined: Wed Jun 18, 2008 10:19 pm
Location: Los Angeles, CA

Post by Spargett » Fri Feb 06, 2009 7:15 am

Thanks Gunner, that's a huge help. I appreciate you taking the time to do that for me.
Gunner_CAF wrote:I don't know if this will help, but I attached a picture. My starter is on the motor now so its hard to get a good shot. The insert is a close up of my old starter. It is not working and my son just put the parts together, but it gives you a better look.

Spargett
honda305.com Member
Posts: 592
Joined: Wed Jun 18, 2008 10:19 pm
Location: Los Angeles, CA

Post by Spargett » Sat Feb 07, 2009 9:38 pm

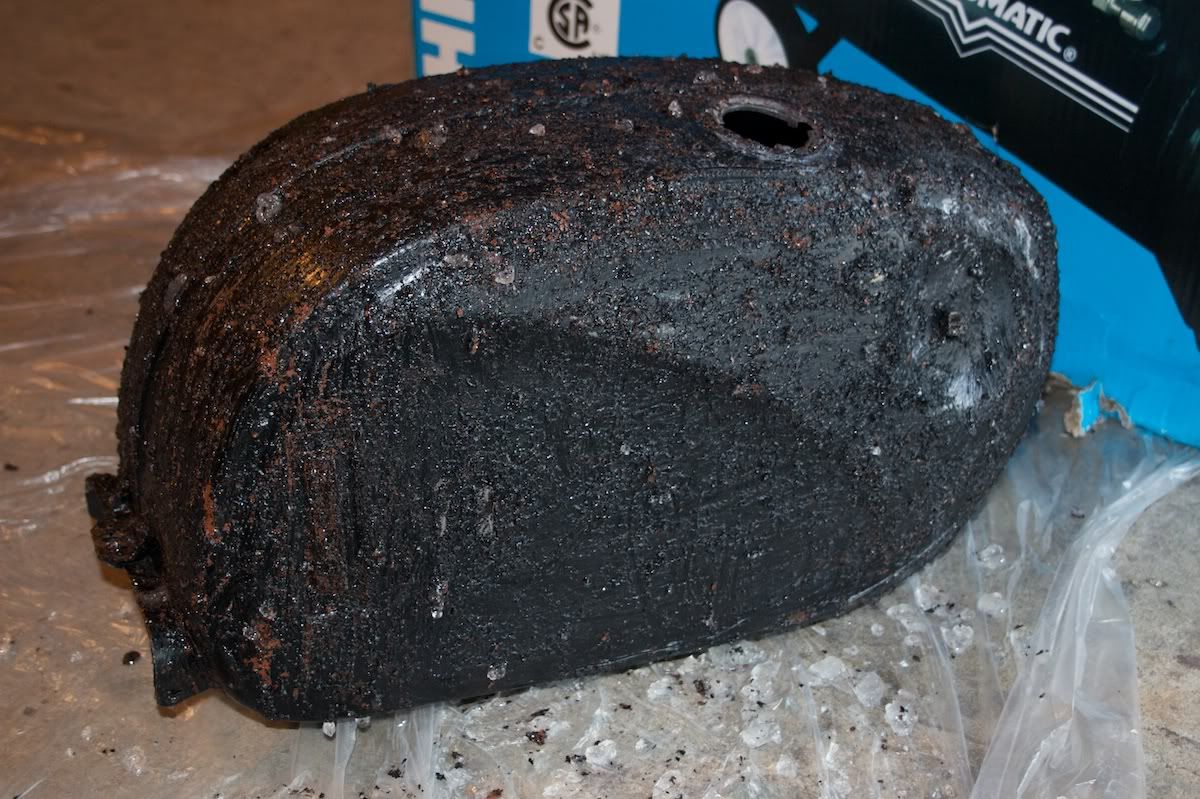
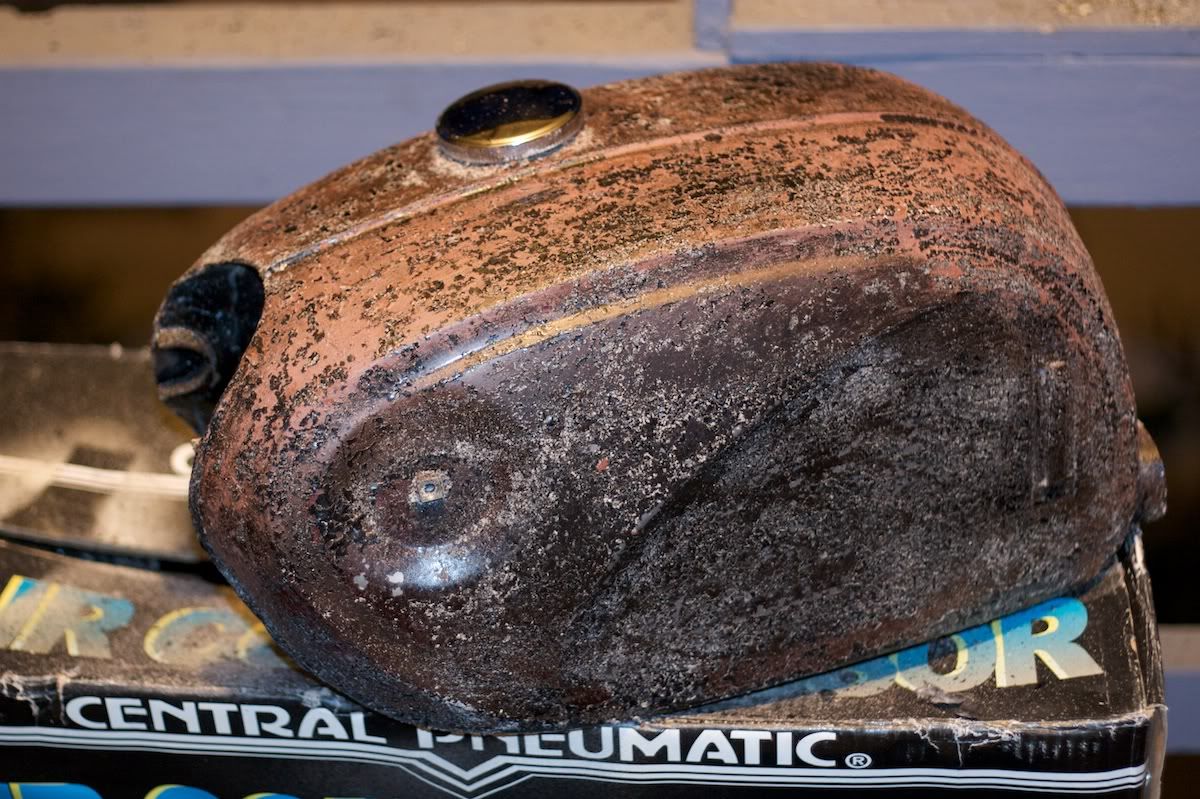
Man, this is some tough paint on the tank. Here is after two rounds of stripping. The first being a supposedly very strong stripper that is a gel form. The second is the aerosol aircraft stripper. The final result is it after scrubbing what I could with a steel wire brush. As you can see it got a little more than half of the top coat off. The red is all of the primer below. In one or two spots you can see the steel below, but for the most part, this has to be the most resilient paint I've ever come across in my life.

I believe its the same paint that was on the chain guard which took two coats of striper and an intensely long bout in the sandblaster with aluminum oxide to clean, which still had some specks I had to basically chisel off!

I'm planing on taking this to a radiator shop to have boiled. the inside didn't come out as clean as I'd hoped and I really don't want to half a$$ the tank. Just one less thing to worry about if its done right. Do most radiator shops need the tank's paint stripped or does boiling pull the paint as well? Because at this point I really don't want to waste the energy trying to get the rest of if I don't have to.

First coat of paint stipper:

Image

Second coat of stripper (aerosol aircraft stripper) Just starting to get down to the primer:

Image

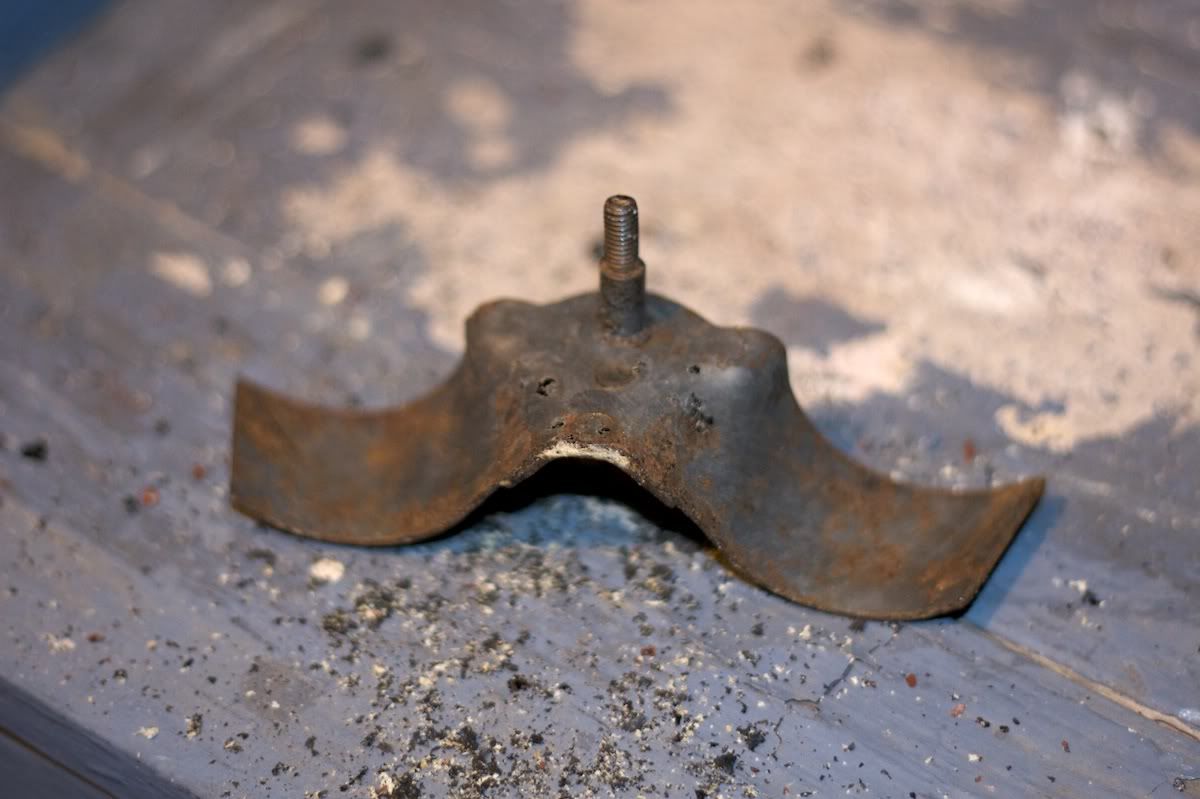
I also stripped the bracket that holds the tank attachment in. That guy went without a fight. Just one coat of the aircraft stripper did the job. Of course I find rust underneath. Another testament to the workmanship I've found throughout the process.

Image

Post Reply


CB-77 | CYP-77 | Road Test | Riding Log | Literature | Zen | Marketplace | VJ Survey | Links | Home