What a concept - A Girl Bringing Back Her 1966 Super Hawk
- sarals
- honda305.com Member
- Posts: 1014
- Joined: Mon Jun 25, 2012 9:19 pm
- Location: Monterey Peninsula, California
I've been doing some fiddling. The crank seal is still leaking, and I've removed it from the engine. The new one should be here this week. Ed thought I might have a leak from the repair I did on the case above the seal. No, that's dry, it's definitely the seal itself. I've bought new plug wires, too. The left side has a very weak spark. She was running rich, and I've got to chase that. I still haven't finished the wheels!!! The closer I get, the further get, it seems....
1965 CB77 305 Super Hawk
1989 NT650 Hawk GT
1981 Yamaha XJ550 Seca
1989 NT650 Hawk GT
1981 Yamaha XJ550 Seca
- sarals
- honda305.com Member
- Posts: 1014
- Joined: Mon Jun 25, 2012 9:19 pm
- Location: Monterey Peninsula, California
Graham, I've been a little bit frustrated. I've been SO careful, and then to have things sneak up on me like this has been disheartening. I mean, that engine is NOT that complex, it's fairly straight forward. It took forever and a day to figure out the oil leak around the head gasket (twice I pulled off the head to fix that), and I am NOT convinced I've beat it. Then, a few drops of gas dripped on the left side crankcase cover, with it's nice "fuel proof" paint, and I now have discolored spots on the cover. I find myself sitting dejectedly on the garage floor and staring at it and wondering "what's next"??? If I was a boy, I'd throw tools - that would probably make me feel better!G-Man wrote:Sara
It feels like you're right back at the start, but just look at all the work you've completed. It won't be long now!
G
1965 CB77 305 Super Hawk
1989 NT650 Hawk GT
1981 Yamaha XJ550 Seca
1989 NT650 Hawk GT
1981 Yamaha XJ550 Seca
- sarals
- honda305.com Member
- Posts: 1014
- Joined: Mon Jun 25, 2012 9:19 pm
- Location: Monterey Peninsula, California
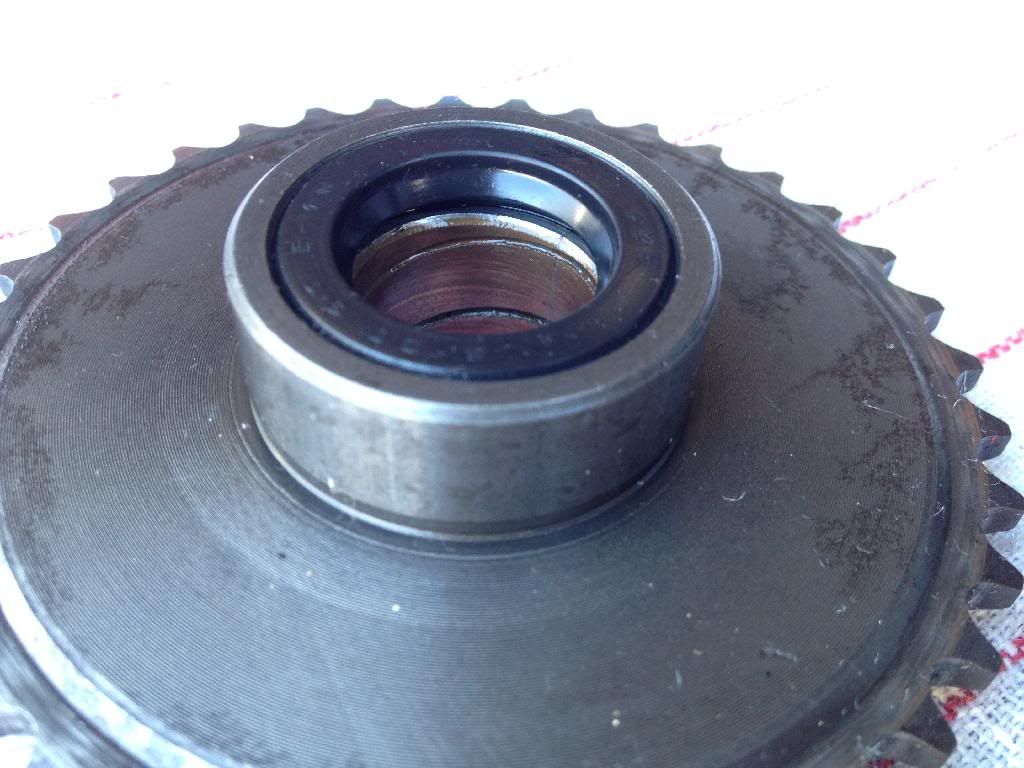
Pulled the seal out. I THINK there was a nick in the seal.

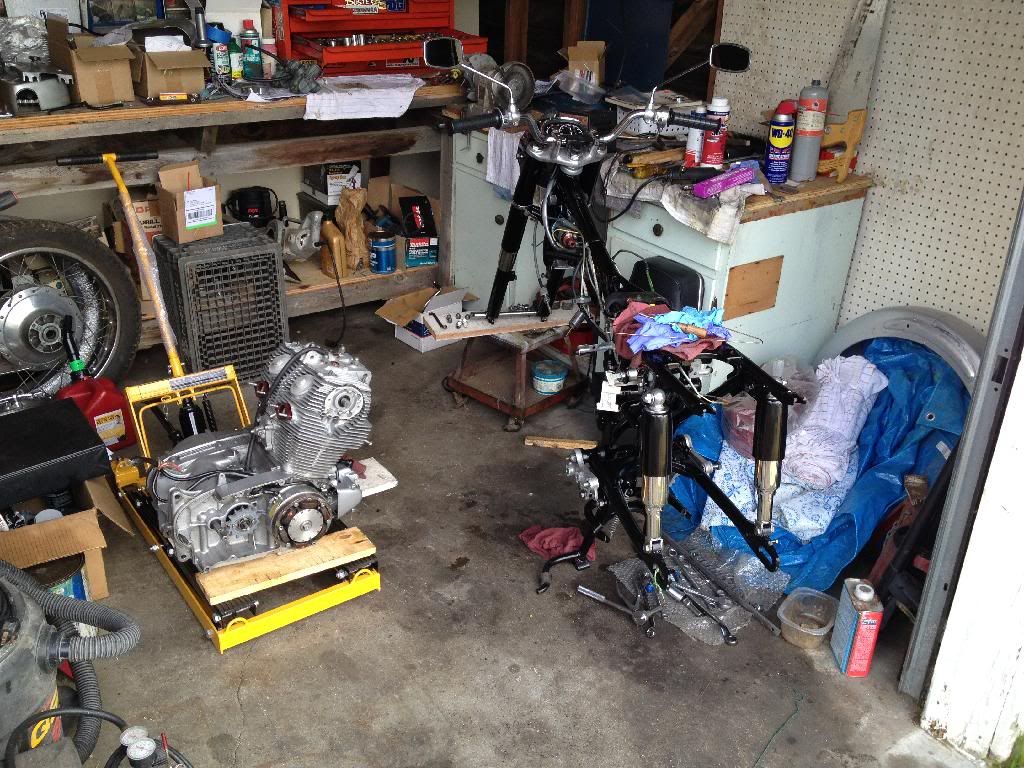
My little corner in my garage. You can see why I wait for warm weather to work!


My little corner in my garage. You can see why I wait for warm weather to work!

Last edited by sarals on Mon Nov 10, 2014 11:44 pm, edited 1 time in total.
1965 CB77 305 Super Hawk
1989 NT650 Hawk GT
1981 Yamaha XJ550 Seca
1989 NT650 Hawk GT
1981 Yamaha XJ550 Seca
Hi,
Please cover your intake and exhaust when the engine is naked ! Dust, sand and moisture have a free ride inside your engine. To lazy to read back, but did you install the oil seal with some oil or grease ? When I install a seal, I cover the shaft with thin plastic sheet (thin bag or the plastic foil you use for food) and slide the seal over the plastic with lot's of grease / oil. This particular seal is difficult to install, I install it at the same time when I install the crank, as one piece (maybe you did that, maybe not). Installing this seal afterwards should be done careful, with a nice flat piece of steel (with an hole in the middle for the shaft itself) and push it straight in, over the plastic covered shaft. Make sure you only press the outer part of the seal, otherwise you will ruin the seal, it is a large seal with a small hole, therefore weak when it comes to installation.
Make sure the surface of the shaft is perfect in the sealing area, use sandpaper 2000 to smooth the surface and make it hold oil together with the seal (protect the bearing for the dust). Remember, seal and surface make the combination, a good seal will leak on a bad surface, a good surface will leak with a bad seal ! Both have to be in perfect shape !
However, since this seal is clamped between the crankcases, I prefer to split the cases installing it, when the engine is out of the frame anyway.
About the paint, well, I always bring my stuff away for painting to a professional, if he/she says the paint is resistant, it's his / her financial responsibility when it's not, including my hours to disassemble and assemble.
But, heads up, it's only a seal, and it's only paint.
You will finish the bike in 2014 for sure, these are only minor setbacks ! and happens to most of us once in a while.
Within a few hours it will be 2014, I wish you a very happy new year !
Jensen
Please cover your intake and exhaust when the engine is naked ! Dust, sand and moisture have a free ride inside your engine. To lazy to read back, but did you install the oil seal with some oil or grease ? When I install a seal, I cover the shaft with thin plastic sheet (thin bag or the plastic foil you use for food) and slide the seal over the plastic with lot's of grease / oil. This particular seal is difficult to install, I install it at the same time when I install the crank, as one piece (maybe you did that, maybe not). Installing this seal afterwards should be done careful, with a nice flat piece of steel (with an hole in the middle for the shaft itself) and push it straight in, over the plastic covered shaft. Make sure you only press the outer part of the seal, otherwise you will ruin the seal, it is a large seal with a small hole, therefore weak when it comes to installation.
Make sure the surface of the shaft is perfect in the sealing area, use sandpaper 2000 to smooth the surface and make it hold oil together with the seal (protect the bearing for the dust). Remember, seal and surface make the combination, a good seal will leak on a bad surface, a good surface will leak with a bad seal ! Both have to be in perfect shape !
However, since this seal is clamped between the crankcases, I prefer to split the cases installing it, when the engine is out of the frame anyway.
About the paint, well, I always bring my stuff away for painting to a professional, if he/she says the paint is resistant, it's his / her financial responsibility when it's not, including my hours to disassemble and assemble.
But, heads up, it's only a seal, and it's only paint.
You will finish the bike in 2014 for sure, these are only minor setbacks ! and happens to most of us once in a while.
Look at my signature, and understand the importance of it ! A great peace of mind in this case is to find rest in your head, let the anger / frustration go, and start over again when you are ready. Throwing things, hammer it, etc, will take you further away from your goal !If I was a boy, I'd throw tools - that would probably make me feel better!
The CB72/77 engines are complex !, not because the amount of parts but because all parts are crucial and have to be good. Not often I see a good working CB72/77 engine without oil leeks, noisy top ends, wrongly installed kick starter mechanism etc, etc. Believe me when I say that any Honda four engine are easier engines to work on !that engine is NOT that complex, it's fairly straight forward
Within a few hours it will be 2014, I wish you a very happy new year !
Jensen
assembly of Japanese motorcycles requires great peace of mind (Pirsig)
Sara
Sound advice from Jensen.
I have been in that same place with a CB250 which I had taken so much care over. It had problems with everything. Rust in the tank / carbs and ignition coils shorting to the tank / frame. The tank had been "sealed" on top of rust by a "professional" restorer before I got the project. It was a difficult time for me with work and I am not proud to say that I threw in the towel and sold the bike, but not before I had bought and re-sprayed a second tank, rebuilt the carbs about 10 times with the consequent spillage of fuel on the lovely painted and lacquered crankcases... It still looked nice but I just hated it for defying me...
Here it is with the professionally (incorrectly) painted tank....

PICT3201.JPG by graham.curtis, on Flickr
Nowadays - I just stop for a while and do something else until I am ready to have another go. Your bike will be finished, just not today. And when it is finished you will have a grin from ear to ear.
Incidentally I concur with Jensen on fitting that seal. If you are fitting it with the cases together I would take a dremel or file to the edge of the crankcases just to break the edge a little to give the seal a lead-in.
Sound advice from Jensen.
I have been in that same place with a CB250 which I had taken so much care over. It had problems with everything. Rust in the tank / carbs and ignition coils shorting to the tank / frame. The tank had been "sealed" on top of rust by a "professional" restorer before I got the project. It was a difficult time for me with work and I am not proud to say that I threw in the towel and sold the bike, but not before I had bought and re-sprayed a second tank, rebuilt the carbs about 10 times with the consequent spillage of fuel on the lovely painted and lacquered crankcases... It still looked nice but I just hated it for defying me...
Here it is with the professionally (incorrectly) painted tank....

PICT3201.JPG by graham.curtis, on Flickr
Nowadays - I just stop for a while and do something else until I am ready to have another go. Your bike will be finished, just not today. And when it is finished you will have a grin from ear to ear.
Incidentally I concur with Jensen on fitting that seal. If you are fitting it with the cases together I would take a dremel or file to the edge of the crankcases just to break the edge a little to give the seal a lead-in.
jensey wrote:Hi,
Please cover your intake and exhaust when the engine is naked ! Dust, sand and moisture have a free ride inside your engine. To lazy to read back, but did you install the oil seal with some oil or grease ? When I install a seal, I cover the shaft with thin plastic sheet (thin bag or the plastic foil you use for food) and slide the seal over the plastic with lot's of grease / oil. This particular seal is difficult to install, I install it at the same time when I install the crank, as one piece (maybe you did that, maybe not). Installing this seal afterwards should be done careful, with a nice flat piece of steel (with an hole in the middle for the shaft itself) and push it straight in, over the plastic covered shaft. Make sure you only press the outer part of the seal, otherwise you will ruin the seal, it is a large seal with a small hole, therefore weak when it comes to installation.
Make sure the surface of the shaft is perfect in the sealing area, use sandpaper 2000 to smooth the surface and make it hold oil together with the seal (protect the bearing for the dust). Remember, seal and surface make the combination, a good seal will leak on a bad surface, a good surface will leak with a bad seal ! Both have to be in perfect shape !
However, since this seal is clamped between the crankcases, I prefer to split the cases installing it, when the engine is out of the frame anyway.
About the paint, well, I always bring my stuff away for painting to a professional, if he/she says the paint is resistant, it's his / her financial responsibility when it's not, including my hours to disassemble and assemble.
But, heads up, it's only a seal, and it's only paint.
You will finish the bike in 2014 for sure, these are only minor setbacks ! and happens to most of us once in a while. Look at my signature, and understand the importance of it ! A great peace of mind in this case is to find rest in your head, let the anger / frustration go, and start over again when you are ready.
Within a few hours it will be 2014, I wish you a very happy new year !
Jensen
'60 C77 '60 C72 '62 C72 Dream '63 CL72
'61 CB72 '64 CB77 '65 CB160
'66 Matchless 350 '67 CL77
'67 S90 '77 CB400F
'61 CB72 '64 CB77 '65 CB160
'66 Matchless 350 '67 CL77
'67 S90 '77 CB400F
- sarals
- honda305.com Member
- Posts: 1014
- Joined: Mon Jun 25, 2012 9:19 pm
- Location: Monterey Peninsula, California
Jensen, Graham, thank you!
Oh, my frustration "displays" are nothing to behold. I might grimace, utter something unlady-like, and then walk away - sometimes for a long while! It does take a calm mind and focus to work on anything mechanical, at least for me it does. If I'm not there, I stay away.
One thing about that seal. It doesn't contact the crankshaft....the starter gear fits inside it. I'll take your advice to heart, Jensen, about how to install it, and I've few other sage words of advice from a good man in Texas, as well. I'll use it all! With great appreciation! Also, I would much prefer to install the seal with the cases split, I did that with the original seal. This time time, though, I am just not going to split those cases - again!
The engine is covered, as well - it wasn't for the photo, because I had just finished doing some work on it. I think like you - if it is open, dirt will enter!
Graham, I'll probably remove that clutch cover and repaint it - and the primary drive cover, too. This time I'll used the 66 Autocolor paint rather than that...ummm...Duplicolor.
Finally -
EVERYONE -
Happy New Year from this Little Blonde Gal!

Last edited by sarals on Mon Nov 10, 2014 11:45 pm, edited 1 time in total.
1965 CB77 305 Super Hawk
1989 NT650 Hawk GT
1981 Yamaha XJ550 Seca
1989 NT650 Hawk GT
1981 Yamaha XJ550 Seca


