Gas Tank Cleaning and De-Rusting Walk Through: ElectrolysisThe reason your bolt wasn't effective is because it appears to be galvanized (zinc-plated). A plain steel bolt would have worked.
The process is "line-of-sight", so any surfaces of the tank that cannot be "seen" by the coat hanger will not be treated. You won't be able to see this because your eye is also operating "line-of-sight". I used a much longer coat hanger and bent if carefully so it would see down into the side of the tank and treated one side at a time. Also, the more coat hanger wire you use, the less time it takes and the less anode cleaning you have to do--it's all about surface area. After cleaning, you can use a similar process with a zinc anode to zinc-plate the inside of the tank as a measure against future rusting. On my bike, all the zinc plated parts were de-rusted using this method, and then immediately re-plated. It's a great combination, and the processes are simple. Wilf Will baking soda work?Hi. I'm very interested in trying out the electrolysis process on my cb77. But I can't find 'Washing soda' where I live (Costa Rica). Does anyone know for sure whether baking soda will work? Thanks GG
Washing Soda vs Baking SodaHi GG.
Washing Soda is Sodium Carbonate, while Baking Soda is Sodium Bicarbonate. WS is much more caustic (pH=11), while BS is weakly caustic (pH=8) ... (pH 7 is neutral). What this all means is that you can use BS, but due to it's weakly alkaline nature it's ability to act as the electrolysis in our gas-tank experiments will be much slower ... or even non-existent. That being said, you can in fact use it successfully but you need to be able to pump 50-60 amps instead of the 10 for washing soda. Your basic trickle charger might not work, or might even burn out. Also, keep an eye on the "pot" if you do use BS. It could get hot (stop and let cool), or bubble and sputter more than you want (put rags around the area to catch splatters. I did a tank successfully with WS (1975 Norton Commando). It had been sitting with a 1/2 tank of sludge for 25 years. It took 2 applications. After flushing the electrolyte solution, I filled the tank 1/2-way with warm, soapy water, and dumped in 3 boxes of 1/2" carpet tacks :) My arms looked like the "Governator's" when I got done shaking the darn thing (over an hour), and it was a pain to extricate all the little tack critters, but the tank looked great when done. I rinsed with warm water. (amended 11-30-10) [Note: the next step needs to be done ASAP or surface rust will begin to build within the hour!] I then prepped the entire inside with JASCO Prep & Primer (local Big-Box hardware store). This etches the bare metal and leaves a gray Phosphate coating which acts as an anchor for the next step (no need to rush now ... the coating is also rust resistant). I then used the POR 15 coating product which sealed the tank with a fuel-proof polymer. Great stuff. The tank was glorious when finished (who but a classic bike nut would refer to the inside of a 45-yr. old gas tank as glorious). I'm about to repeat this week on my '66 CB-77 which has minor scale and rust. Washing Soda is available on eBay or through auto supply sites (sold as electrolysis powder, etc.). It's also known as "caustic soda". If you have a WINCO near you, they carry it. Good luck! Ride with passion! Dana
Last edited by Dana01 on Tue Nov 30, 2010 7:57 pm, edited 1 time in total.
I used baking soda on my Hodaka Dirt Squirt motorcycle tank (Chrome steel tank) and it took about 12 hours to completely de-rust the tank. The amount of brown / green ugly stuff that came out was substantial and pretty cool at the same time. I drained and re-did the process about 10 times and completely rinsed the tank (I used Tide detergent and hot water) between each session. The before and after was obvious; it had worked.
Warnings: 1. Do not allow your wires to touch the tank. If left this way even for a short time it will create a black spot on the chrome. Suggest using covered wire instead of bare wires outside the tank. 2. Do not over due this. I did. Removing rust was great, but when I was done I had some areas on the tank I had to repair. What happened was that the flaking rust was actually filling a few very small pin-sized holes. Note: I found the amount of baking soda to water ratio inconsequential. A small amount 1/8 cup vs 1/4 made no appreciable difference.
i would love to hear more about this.
Been watching these threads on "rustolisis" since at least 2008 and figured sooner then later I would need to derust a tank; and so it has, the last bunch of bikes I got three with gnarly insides. I re-read all the post I could find but didn't have any washing soda to try it, then one of the old links was an artifact restorer would said if you took ordinary baking soda and heat it in the oven at 300@ for an hour it turns into washing soda; so I did that and it must work cause after I put the mad scientist contraption together it drew good current.
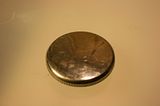
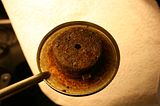
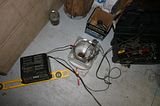
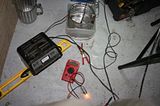
I wanted to start small so I started with the cap off the tank off my '63 Dream; which looked ok till you turned it over:   As this was a small round object and the instructions said it's best when the sacrificial metal surrounds the piece; I cut the bottom out of a tin can (isn't that getting hard to find---even coffee comes in plastic now) and put the cap in the center, mixed up some of the cooked baking soda and turned it on; The set-up: battery charger and a 3watt bulb for current limiting as I don't have any way to regulate the amps.  As you can see it is bubbling away and the light is nice and bright. The light is an easy indicator if you don't have the connections right.  Next I have to find a way of getting some iron inside the tank. Thanks to all who helped contribute to this thread. Clarence
| |||||||||||||||||||||||||||||||||||||||||||||||||||||||||||||||||||||


