honda305 Home honda305 Auctions honda305 Gallery honda305 Forum


honda305.com Forum

Login
□ Search
□ FAQ 
□ 
Vintage Honda Owners,
Restorers, Riders and
Admirers

1962 Superhawk Restoration: Here I go

Post Reply
Gunner_CAF
honda305.com Member
Posts: 316
Joined: Sun Oct 12, 2008 5:28 pm
Location: Wisconsin, USA

Re: starter boot

Post by Gunner_CAF » Tue May 19, 2009 11:55 pm

Spargett wrote:Lee, thanks for that. I'll certainly give them a call. Its a shame their ordering process is such a pain. Must have never heard of PayPal ; ) I'm from San Francisco, sitting out this summer in Sacramento then back to the bay.
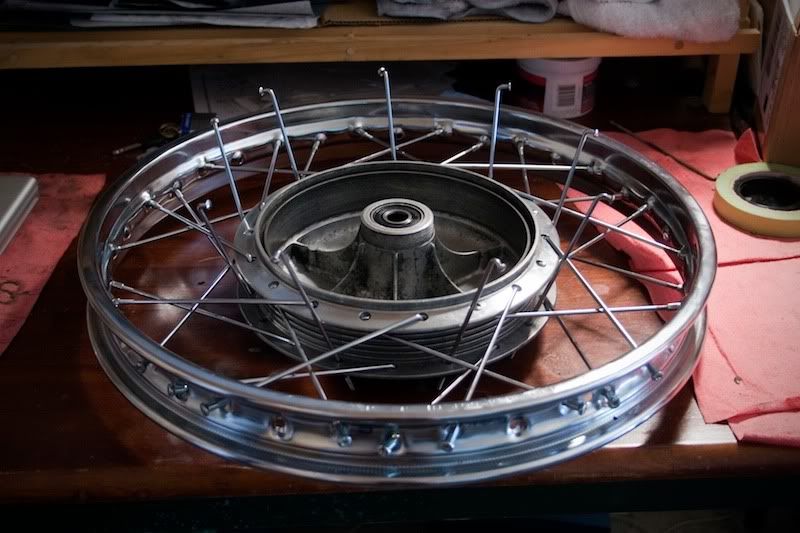
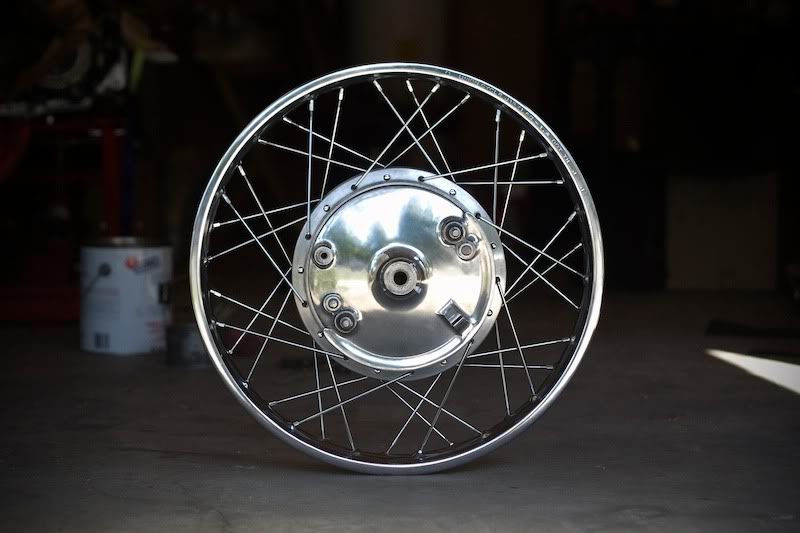
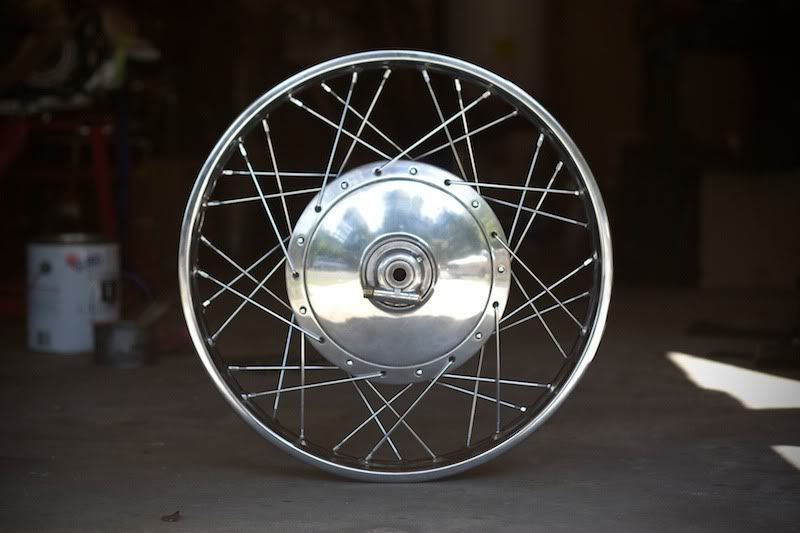
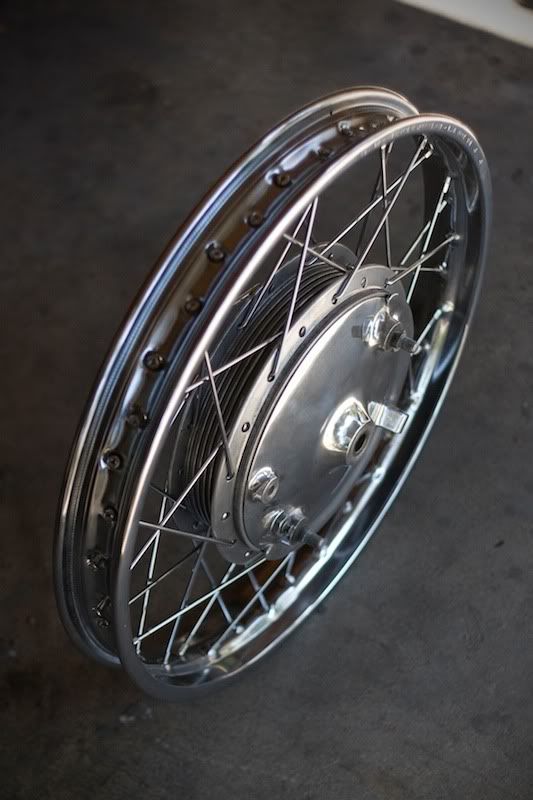
It is too bad Ohio Cycle doesn't have an ordering process like Retro Bikes. I was very happy with my order from Ohio Cycle, but their ordering process added a extra week to get my parts.

Gunner

Spargett
honda305.com Member
Posts: 592
Joined: Wed Jun 18, 2008 10:19 pm
Location: Los Angeles, CA

Post by Spargett » Wed May 20, 2009 4:56 am

Just a few questions I was wondering if anyone could help answer. I know they can get lost amidst the images and descriptions, so I'm just going to lay them out right here.
  • Camchain Breaking

    1: I'll need to break the cam chain. Should I get a tool for this, or can this be done with a dremel or other tools? And if so, will a normal drive chain breaker work for the smaller cam chain? Can I just break any of the links? (see photo)

    Crankcase Washers & Screws

    2: I was wondering as I was putting my left crankcase cover on if I should use any washers under the screws? Or locktite? (see photo)

    Copper Exhaust Gaskets

    3: The copper exhaust gaskets that came with my gasket kit are really tight fit. I assume these should be recessed all the way inside, completely flush with the back? (see photo)

    Mystery Hole

    4: What is this hole above and to the left of the kick start shaft? It appears to be threaded on the inside. I can't find any mention of it in the parts or shop manuals. (see photo)

    Swing Arm Bushings - Sans Press

    5: I don't have a hydraulic press. Is there a way to get the swing arm bushings out and replaced through another method? I was thinking of using a rubber mallet and same sized socket to "punch" it in and out? I made the mistake of not taking them out before powder coating. (see photo)

    Oily Head Gasket

    6: As you'll see in the photo, I got some oil onto the head gaskets accidently. Does this jeopardize the integrity of the gasket if it has absorbed any oil? (see photo)

    Paper 'Gaskets'? Under Cylinder Head Acorn Nut Washers

    7: When taking off the top cylinder head, I saw that there were what appeared to be thin paper 'gaskets' for lack of a better word, underneath the washers that sit between the top of the head and the nut that bolts it down. They don't appear to be the in the parts manual at all. I was wondering what the purpose was of these, and if they're something I need to hunt down. (see photo)

Thats all I have for now, but I just wanted to get them out of the way in an organized fashion. I thank you in advance is there's any light you can shine on these questions for me.

User avatar
davomoto
honda305.com Member
Posts: 2508
Joined: Sat Nov 18, 2006 7:36 pm
Location: Marin County CA

Post by davomoto » Wed May 20, 2009 4:00 pm

1) Do you have a master link for the chain? If so, a bicycle chain breaker will push the pins out tnicely, you'll have to remove one complete link.

2)No loctite, washers are not stock, and not a bad idea, personal preference here.

3) Yes tight fit. Seat them completely with appropriate sized socket or pipe.

4) End of thread hole for cranckcase bolt, nopt normally open , must be a piece broken off cases, JB weld ought to do it.

5) Use a vice to press bushing in, a light coat of grease will help.

6) Just wipe it clean before installing head. I like to put a little Hondabond around the 2 o-rings.

7)No paper gaskets. I like to use all brass washers under 8 acorn nuts.

8) Send beer to davomotos house!

davomoto

Spargett
honda305.com Member
Posts: 592
Joined: Wed Jun 18, 2008 10:19 pm
Location: Los Angeles, CA

Post by Spargett » Wed May 20, 2009 4:11 pm

Thanks a million Davo. You just put an end to a million little things swirling around in my head. Maybe I'll bring a case by as soon as she's running.
davomoto wrote:8) Send beer to davomotos house!

User avatar
davomoto
honda305.com Member
Posts: 2508
Joined: Sat Nov 18, 2006 7:36 pm
Location: Marin County CA

Post by davomoto » Thu May 21, 2009 4:41 pm

Only if you help empty the bottles!

davomoto

Spargett
honda305.com Member
Posts: 592
Joined: Wed Jun 18, 2008 10:19 pm
Location: Los Angeles, CA

Post by Spargett » Sun May 24, 2009 3:49 am

So I apologize for the lack of updates. I'm about to reassemble the top end in the next few days. As soon as I can find a good helping hand to go with the process.

The two other things that are really holding me back are, polishing all the hubs correctly. I've been learning the hard way with those, which is racking up the hours in the garage.

The other time vampire is the fact that my fenders and air filter cover were powder coated too dark, so I'm pulling teeth trying to get an accurate color.

I'm also trying to get my bushings out of my rear swing arm. I was able to punch the "core" out, but the metal ring remains, steadfast as all hell. It's too thin to punch with a socket, so I might try cutting with a dremel and pulling it out piece by piece.

Image

I also found this little vintage gem on eBay. Thought you'd all appreciate it.

Image

Spargett
honda305.com Member
Posts: 592
Joined: Wed Jun 18, 2008 10:19 pm
Location: Los Angeles, CA

Post by Spargett » Tue Jun 09, 2009 6:05 pm

So I was struggling with getting the wheels laced up properly. But came up on top eventually. Here's what I found to be important information in getting the job done right.

Phase 1 (lace each side - 45° spokes going under)

Image

Phase 2 (lace opposite side - 90° spokes going over - Drop spokes in from above)

Image

Phase 2 - Laced

Image

Phase 3 (Flip wheel over and drop 45° spokes in just as done in phase 2)

Image

Voilà - I think the main thing overlooked in instructions is the ORDER in which the spokes are dropped in and how. I found this video to be a great help in that respect.

Image

Image

Image

Post Reply
cron


CB-77 | CYP-77 | Road Test | Riding Log | Literature | Zen | Marketplace | VJ Survey | Links | Home